Komos Kegerator Assembly - Part 1

I finally got some time in my schedule to start assembling my new four-tap Komos V2 Kegerator, and since we're snowed in with record-low temperatures here in Irondale, spending some time in the cozy brew space seemed like a great way to spend part of a Saturday.
When the kegerator was delivered, the first thing I did was install the casters, let it sit upright for a couple of days, and then plugged it in and let it run for a day just to make sure everything was functioning properly. It got down to 37 degrees F very quickly!
Next up in the assembly process is installing the tower, taps, and beer lines.
Installing the Tower
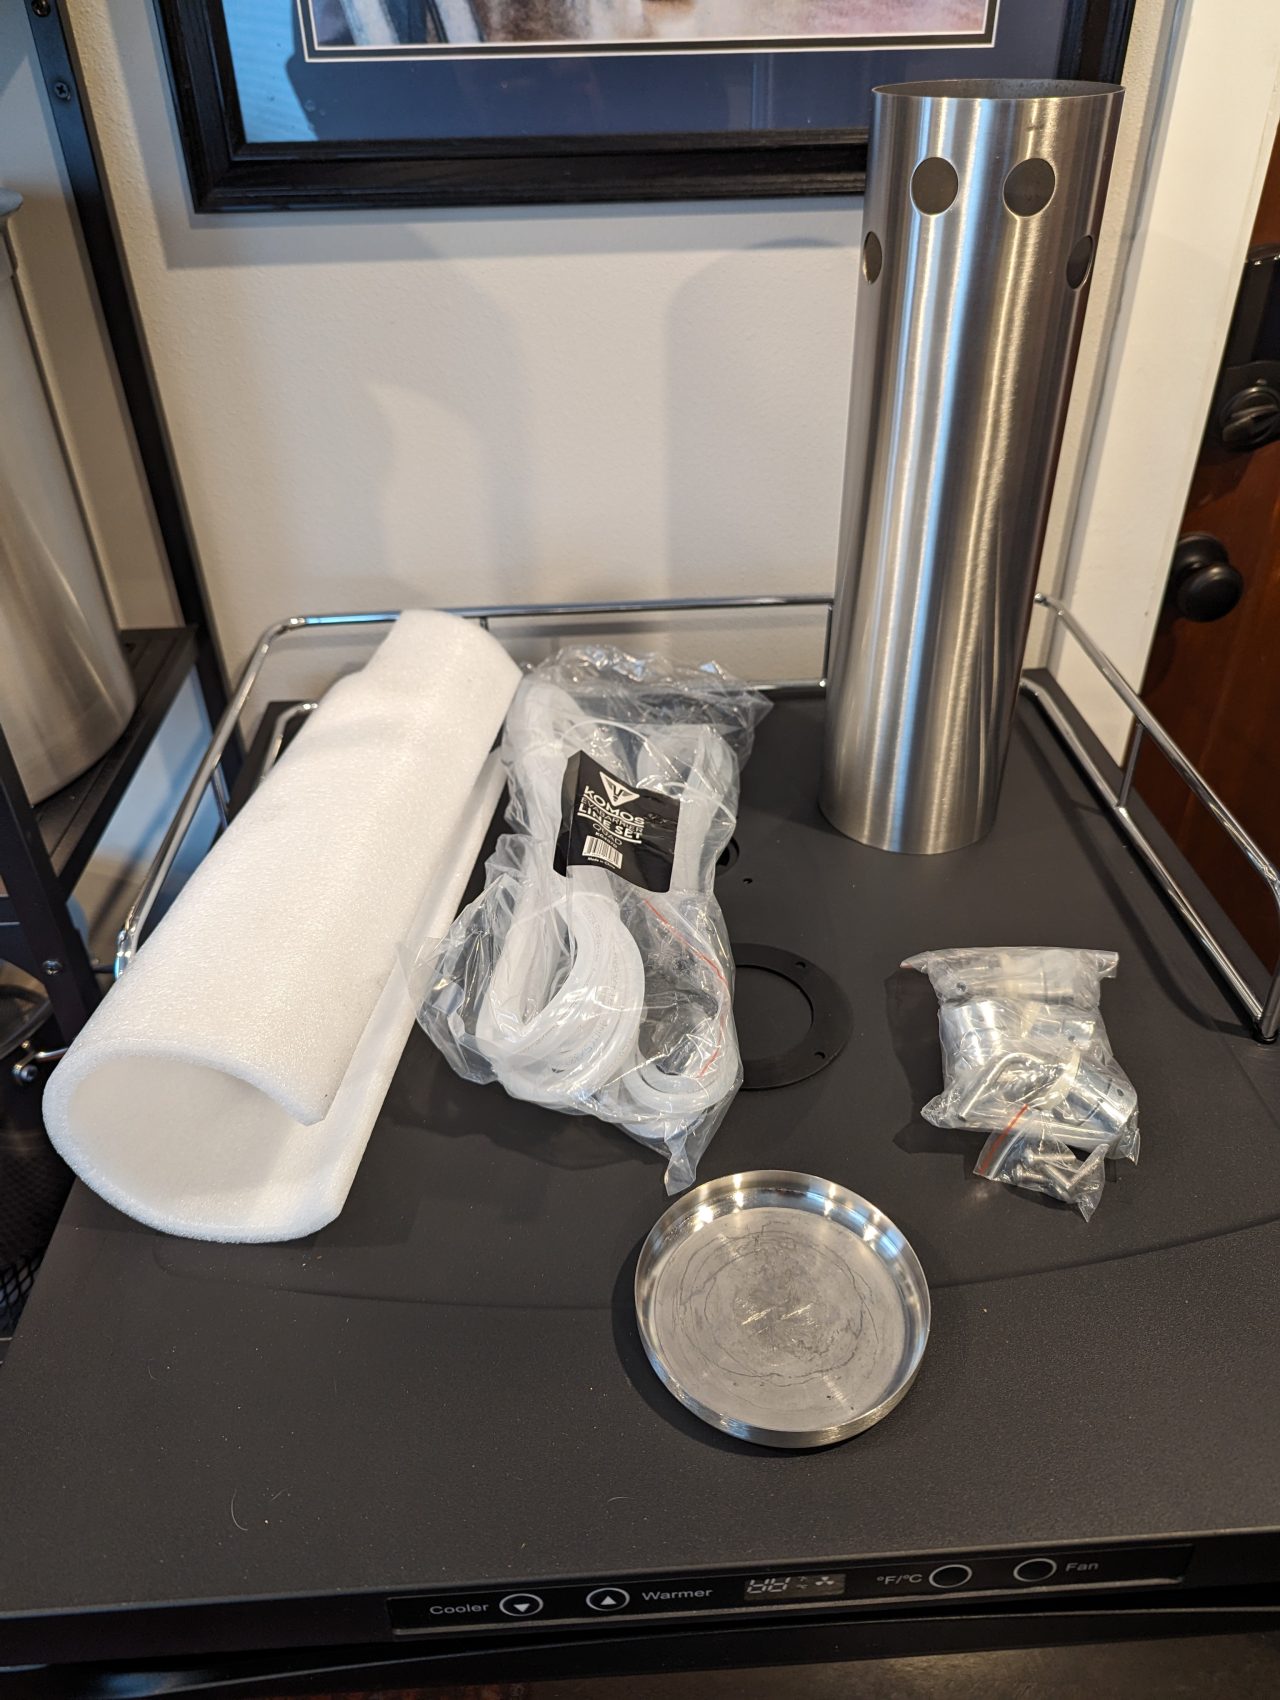
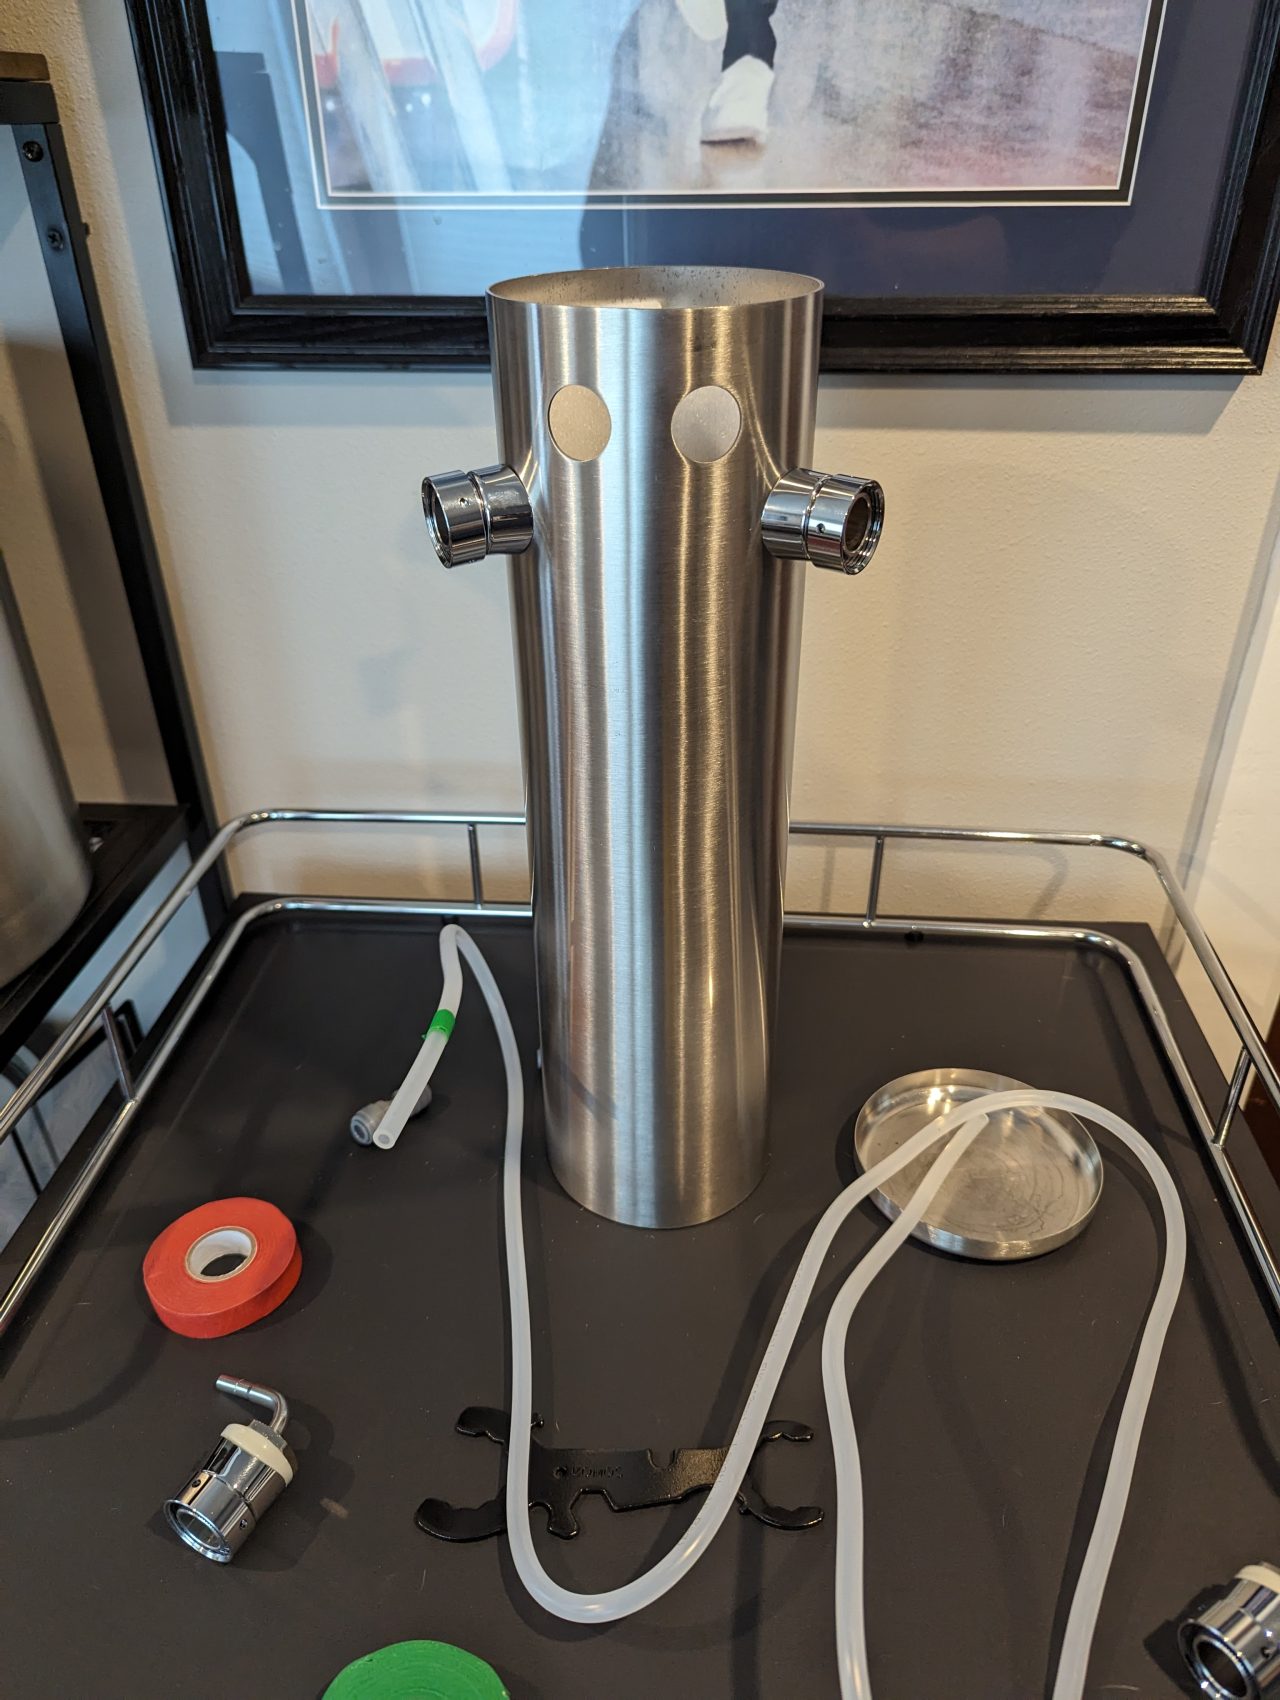
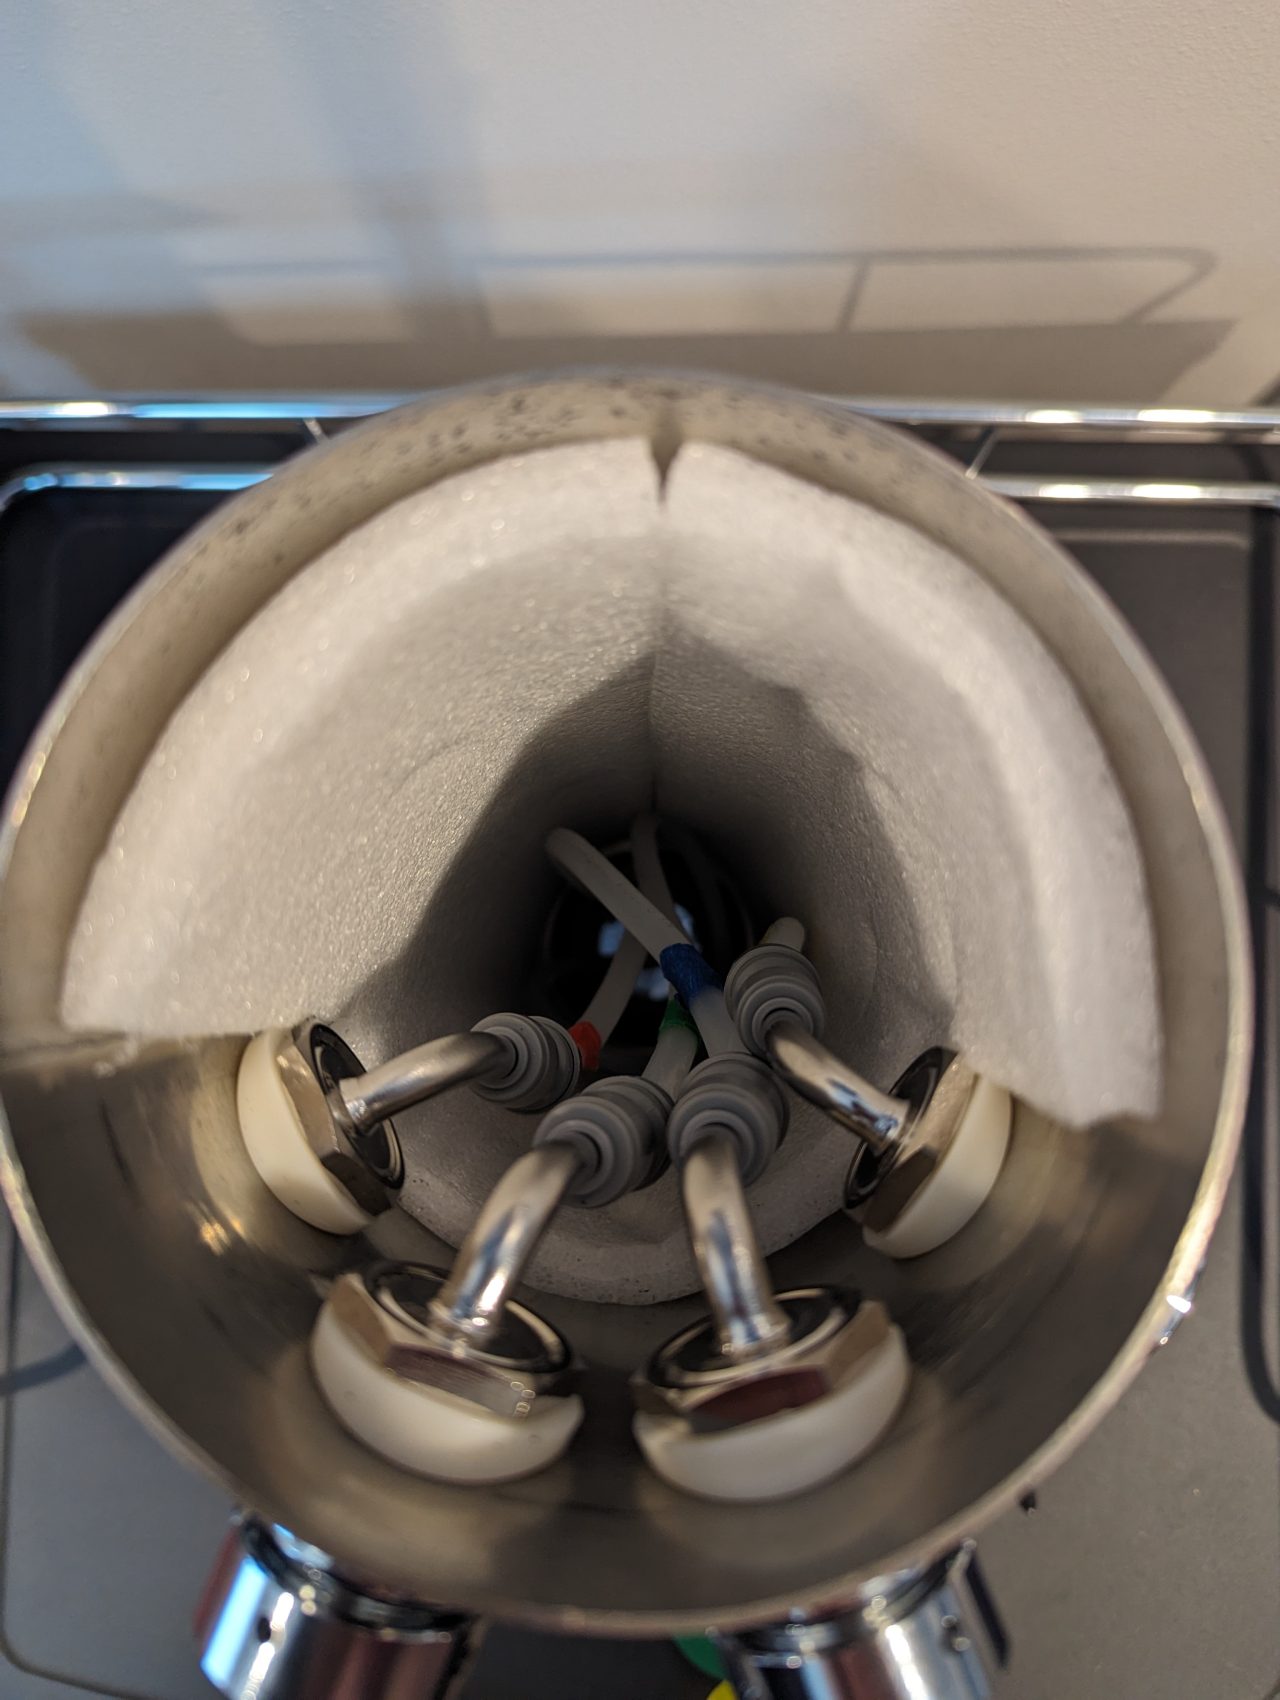
The necessary screws, tap shafts, rubber gasket, beer and gas lines, wrench, and insulation are all packed within the tower itself. Don't toss that insulation! Since this kegerator has a cooling tube that goes from fan up into the tap tower to keep the tower cool and reduce foaming, you're going to to keep this insulation in the beer tower after assembly. (Random aside, I'm probably going to add a piece of insulation to the top as well since I've read some people get condensation on the cap itself.)
I didn't take super thorough photos of each step as I went, but the basic steps are:
- Remove the plug from the top of the kegerator (it ships with a plug installed so you could use it as a regular fridge if you wanted)
- Put the rubber gasket in place and align the holes in the gasket with the holes in the top of the kegerator
- Place the tower on top of the gasket, aligning the holes and roughly centering the tap holes (fine adjustments come later)
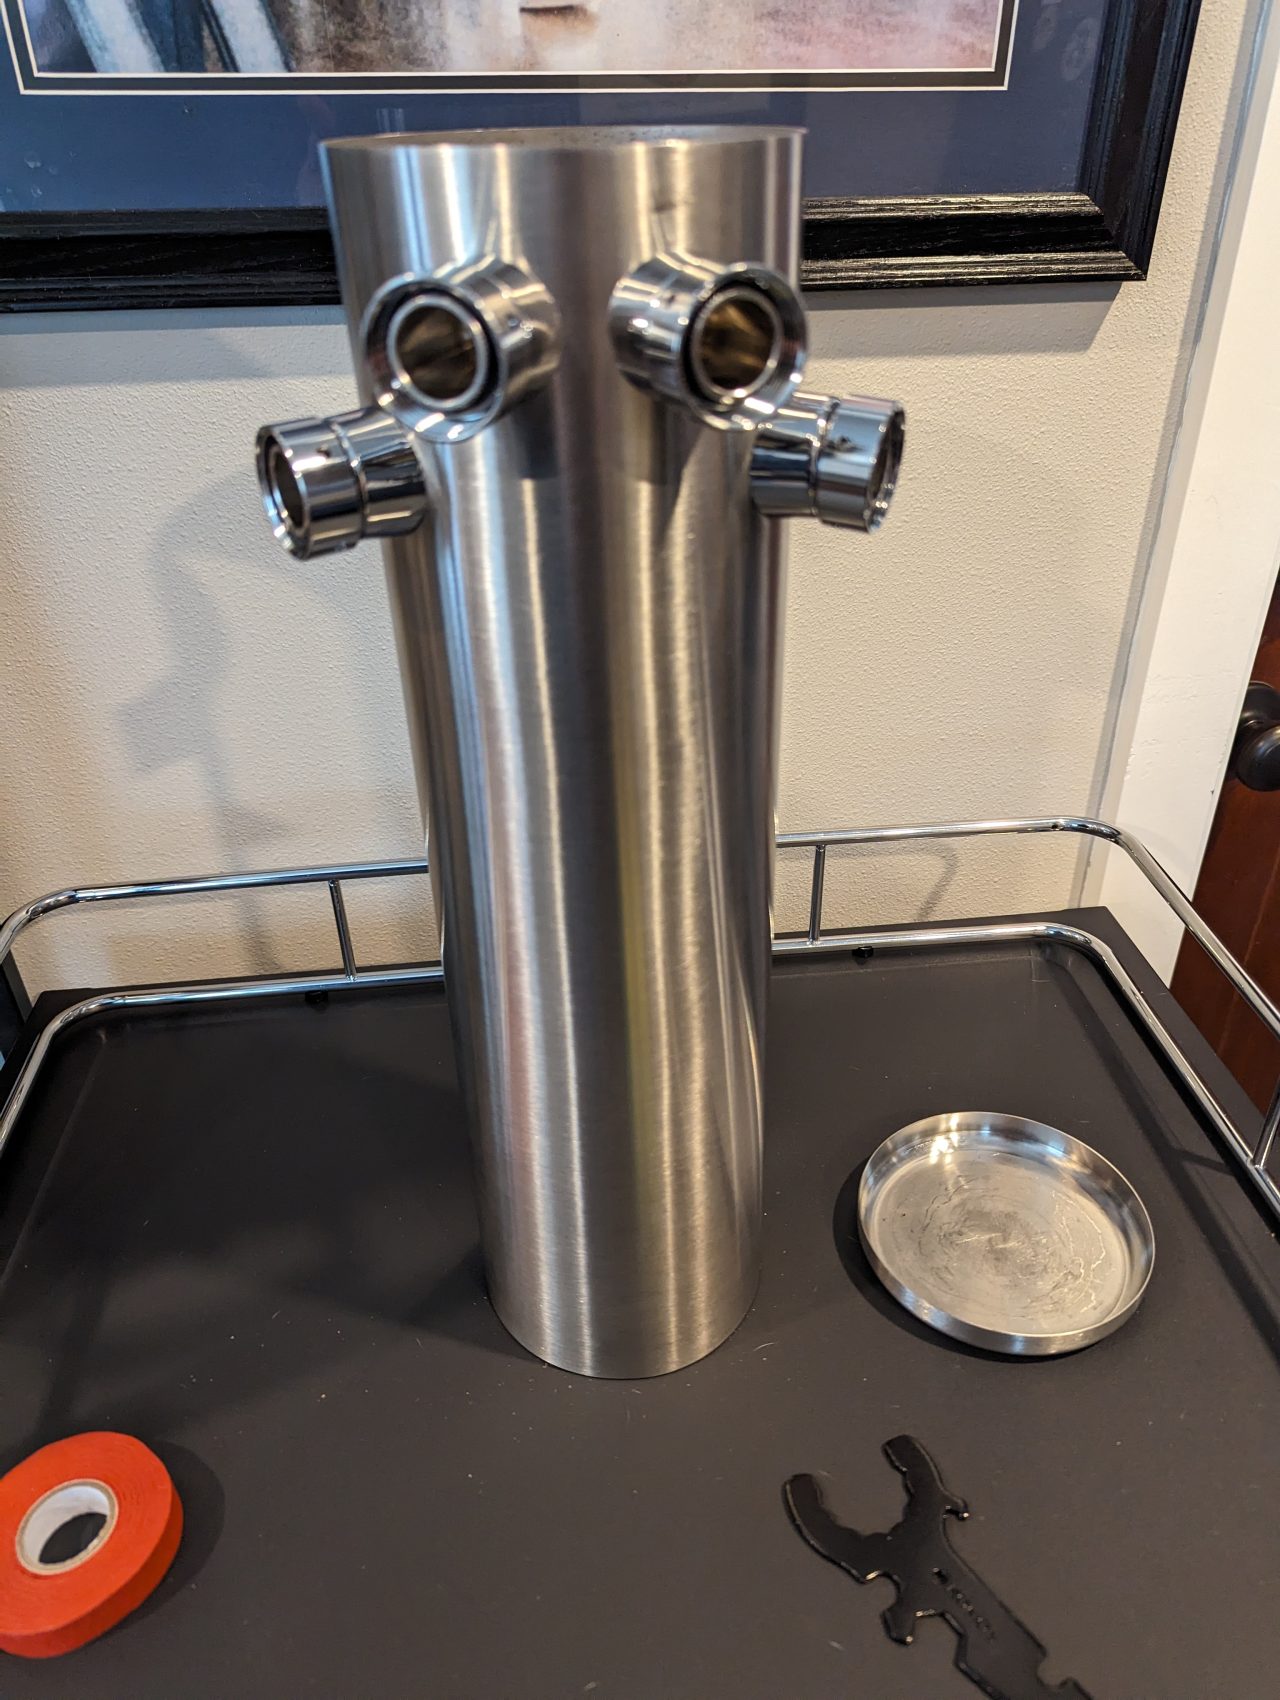
- Screw the tower to the top of the kegerator using the supplied screws
- Put the insulation back inside the tower
Since you have to reach inside the tower to install the screws, unless you have a long screwdriver with a screw holder of some sort (I'm not sure magnetic would cut it for this situation), I strongly suggest hand-placing and hand-tightening the screws to get them started, and then screwing in with a screwdriver. That seemed to work well for me at any rate
Keep the screws a bit loose initially and when you have them all in place, make sure the tower is centered and tighten the screws completely.
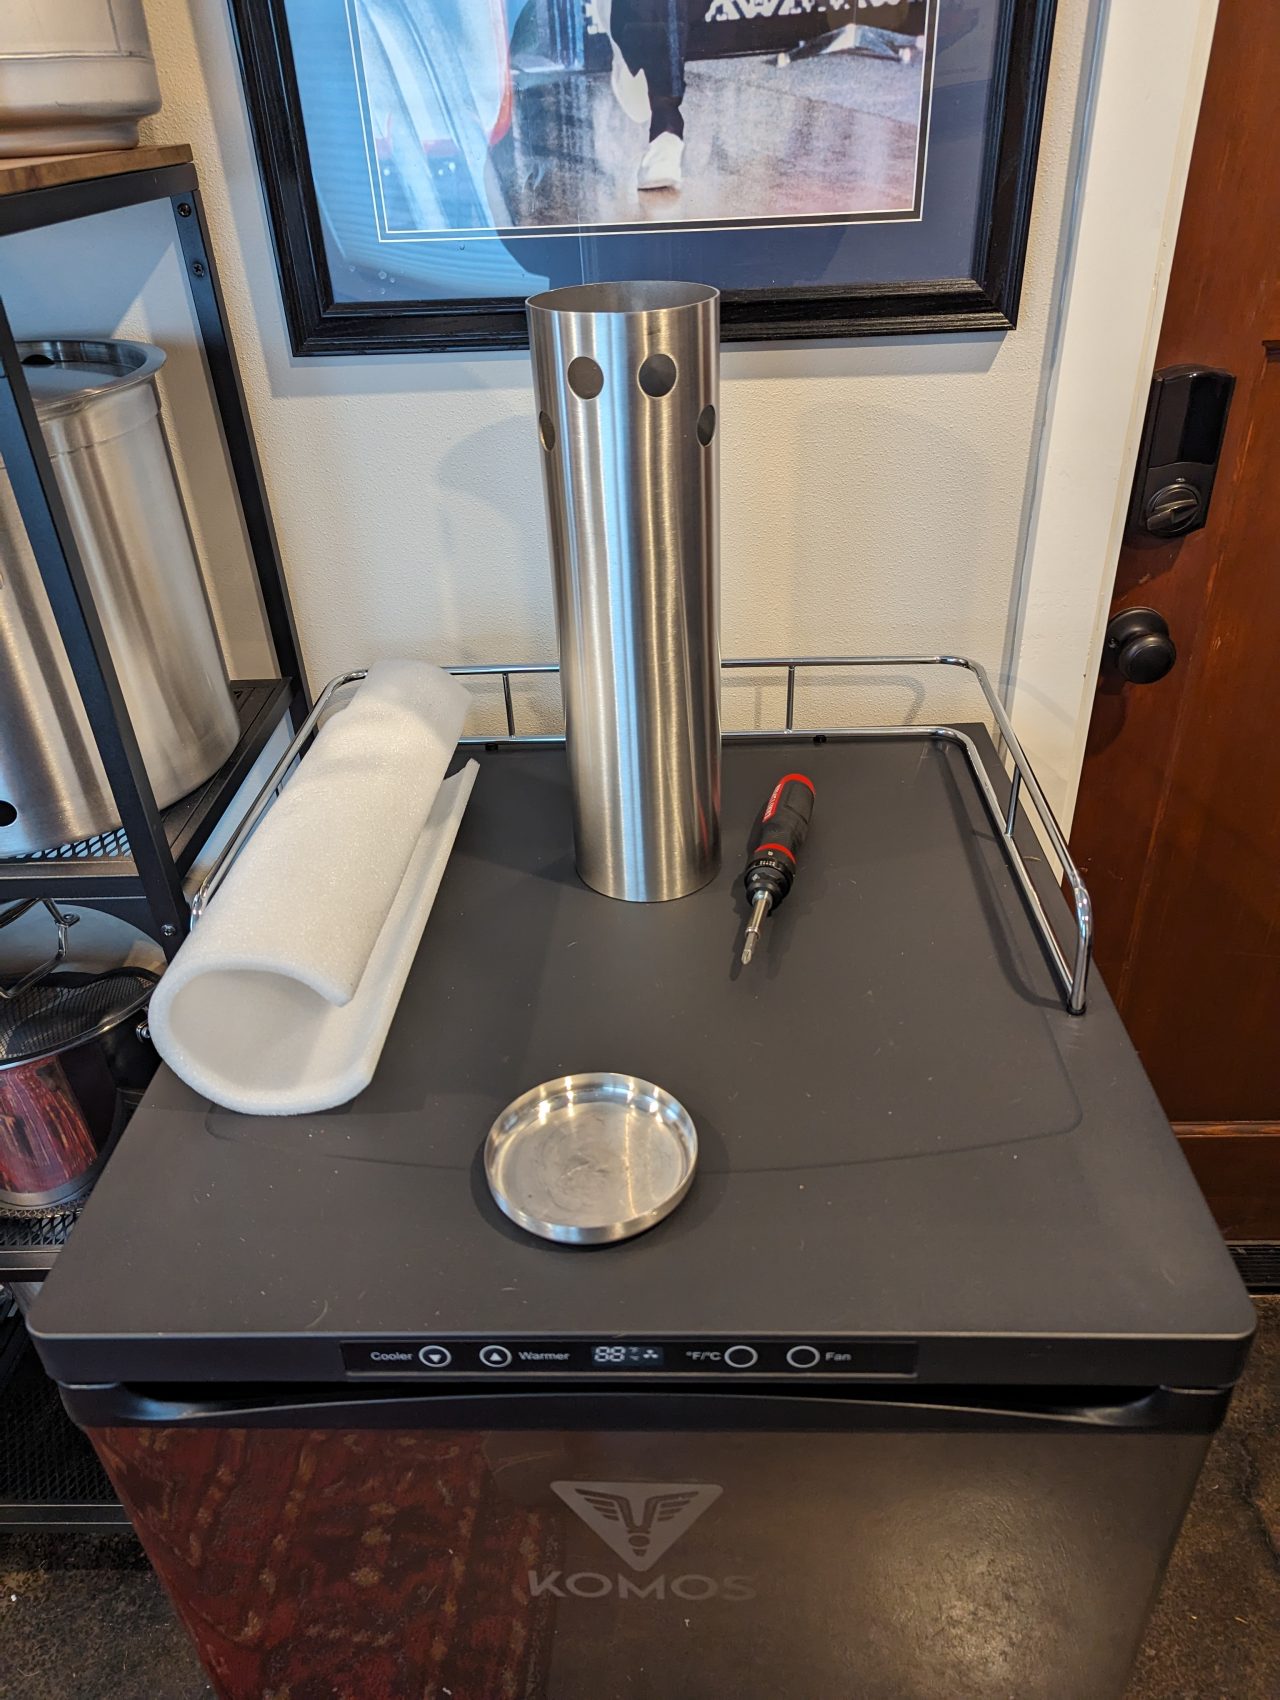
Put the insulation back inside the tower, and step 1 is complete!
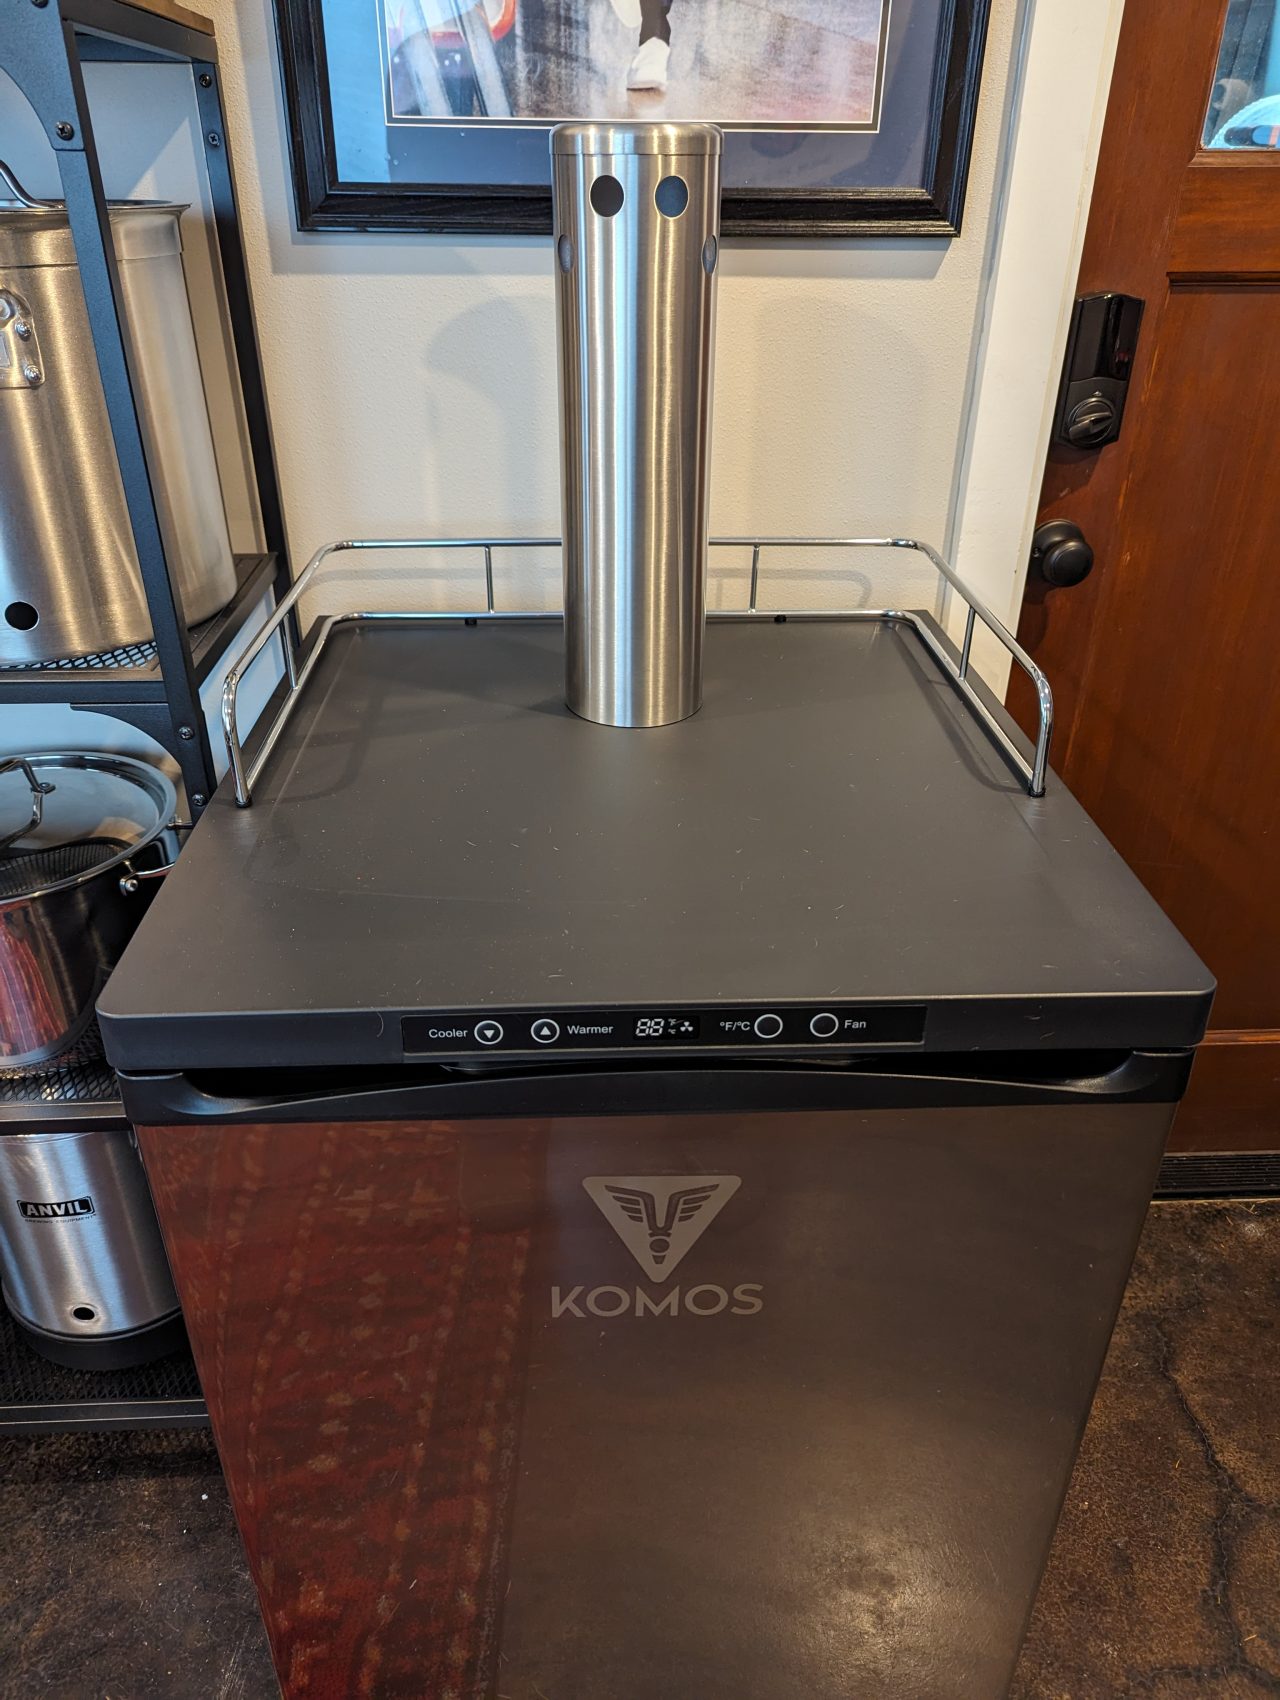
I should have also mentioned before I installed the tower, I popped the rails/cage thingee in place which is just a matter of inserting the pegs on the rail assembly into the holes on top of the kegerator.
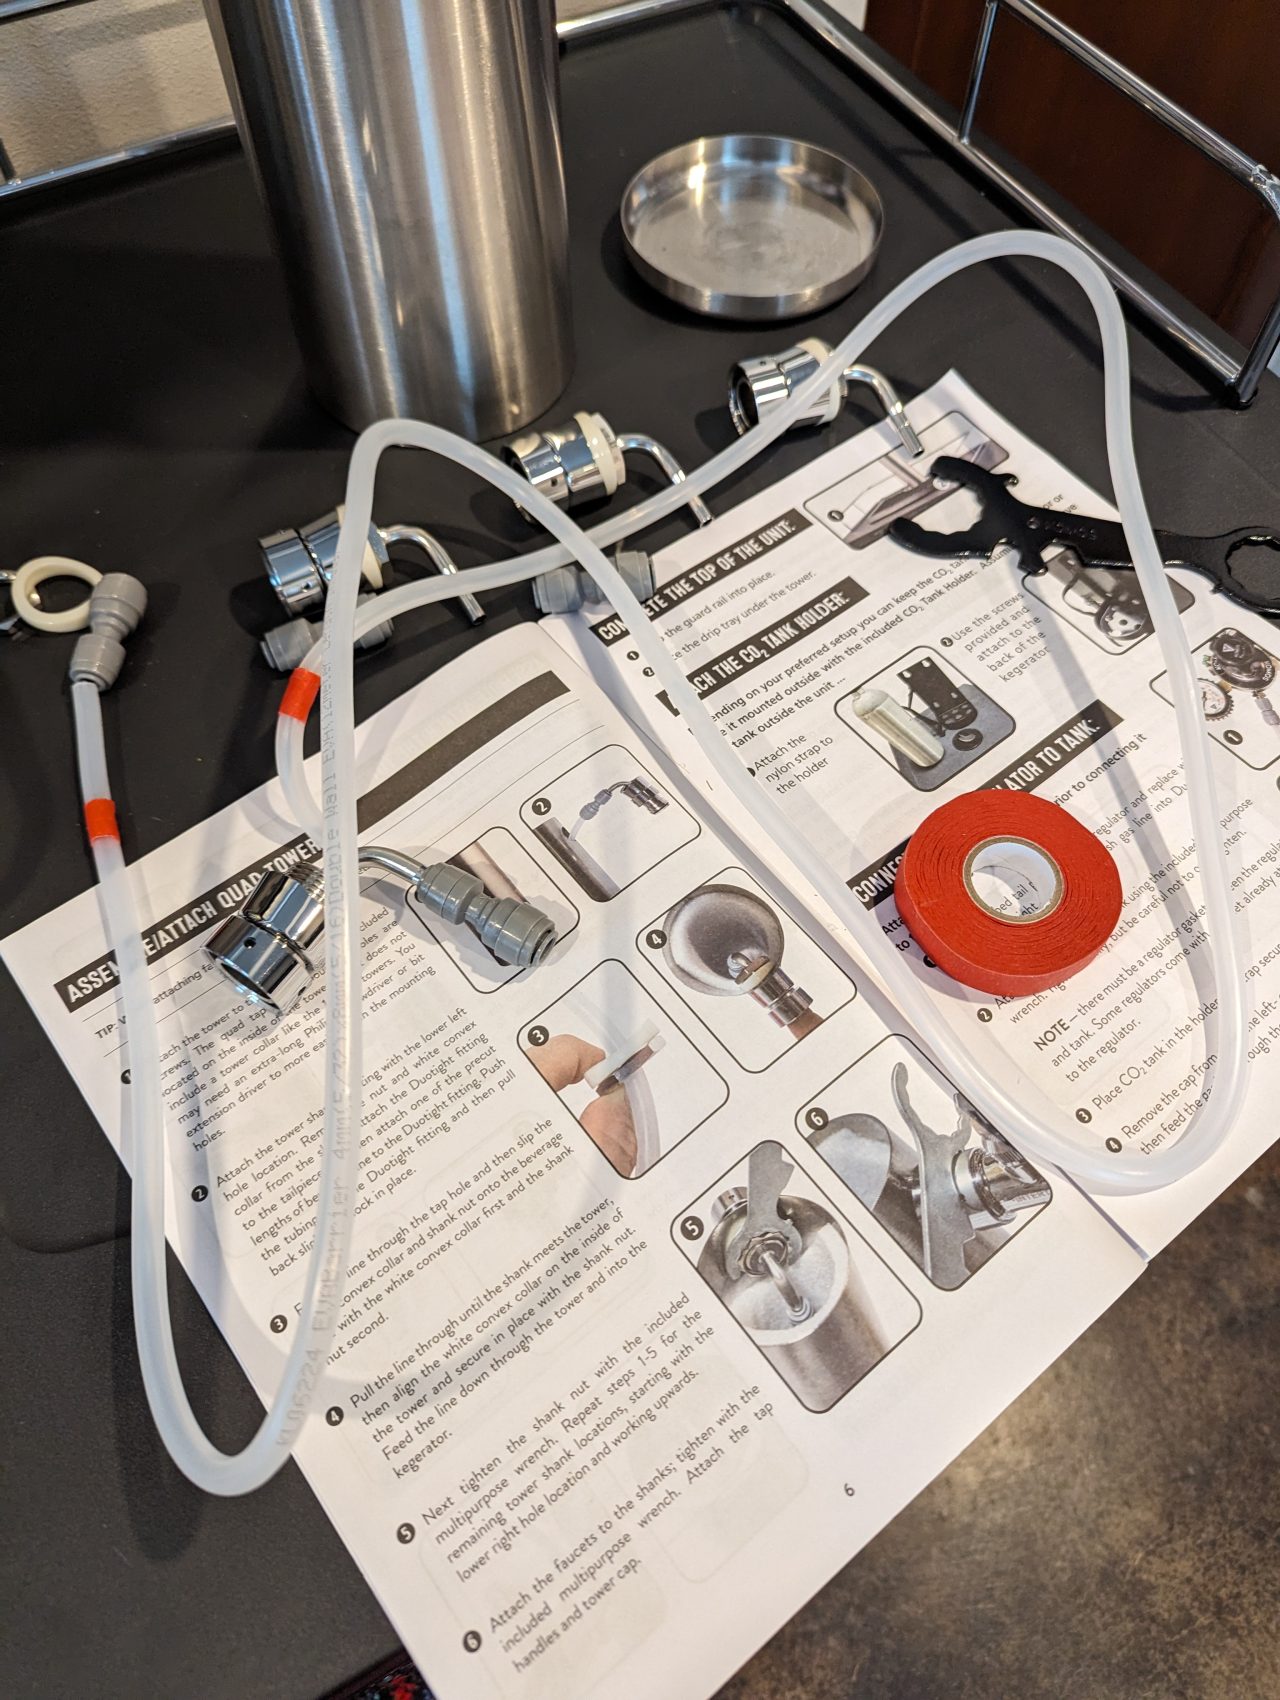
Cutting and Marking the Beer Lines
The kegerator ships with two pieces of EVABarrier tubing: 1. A 12-meter length of 8mm outer diameter (OD) x 4mm inner diameter (ID) beer line 2. A 12-meter length of 8mm OD x 5mm ID gas line
The first thing I did was cut the beer line in half, and then I cut each of those two pieces in half again to get four beer lines each about 3 meters (a little under 10 feet) in length, which should be a good line length for this setup. (If nothing else it's a good starting point and I'll fine-tune later.)
To cut the lines, I used this tube cutter because with Duotight lines it's pretty important to get straight cuts. This was a handy tool but I found that I had to do a bit of additional fine-grained snipping to get the ends really straight, and also be warned that -- in my use anyway -- the design of this cutter is such that I pinched my palm on the back hinge of this thing with every cut. I'll adjust my technique when I cut the gas lines.

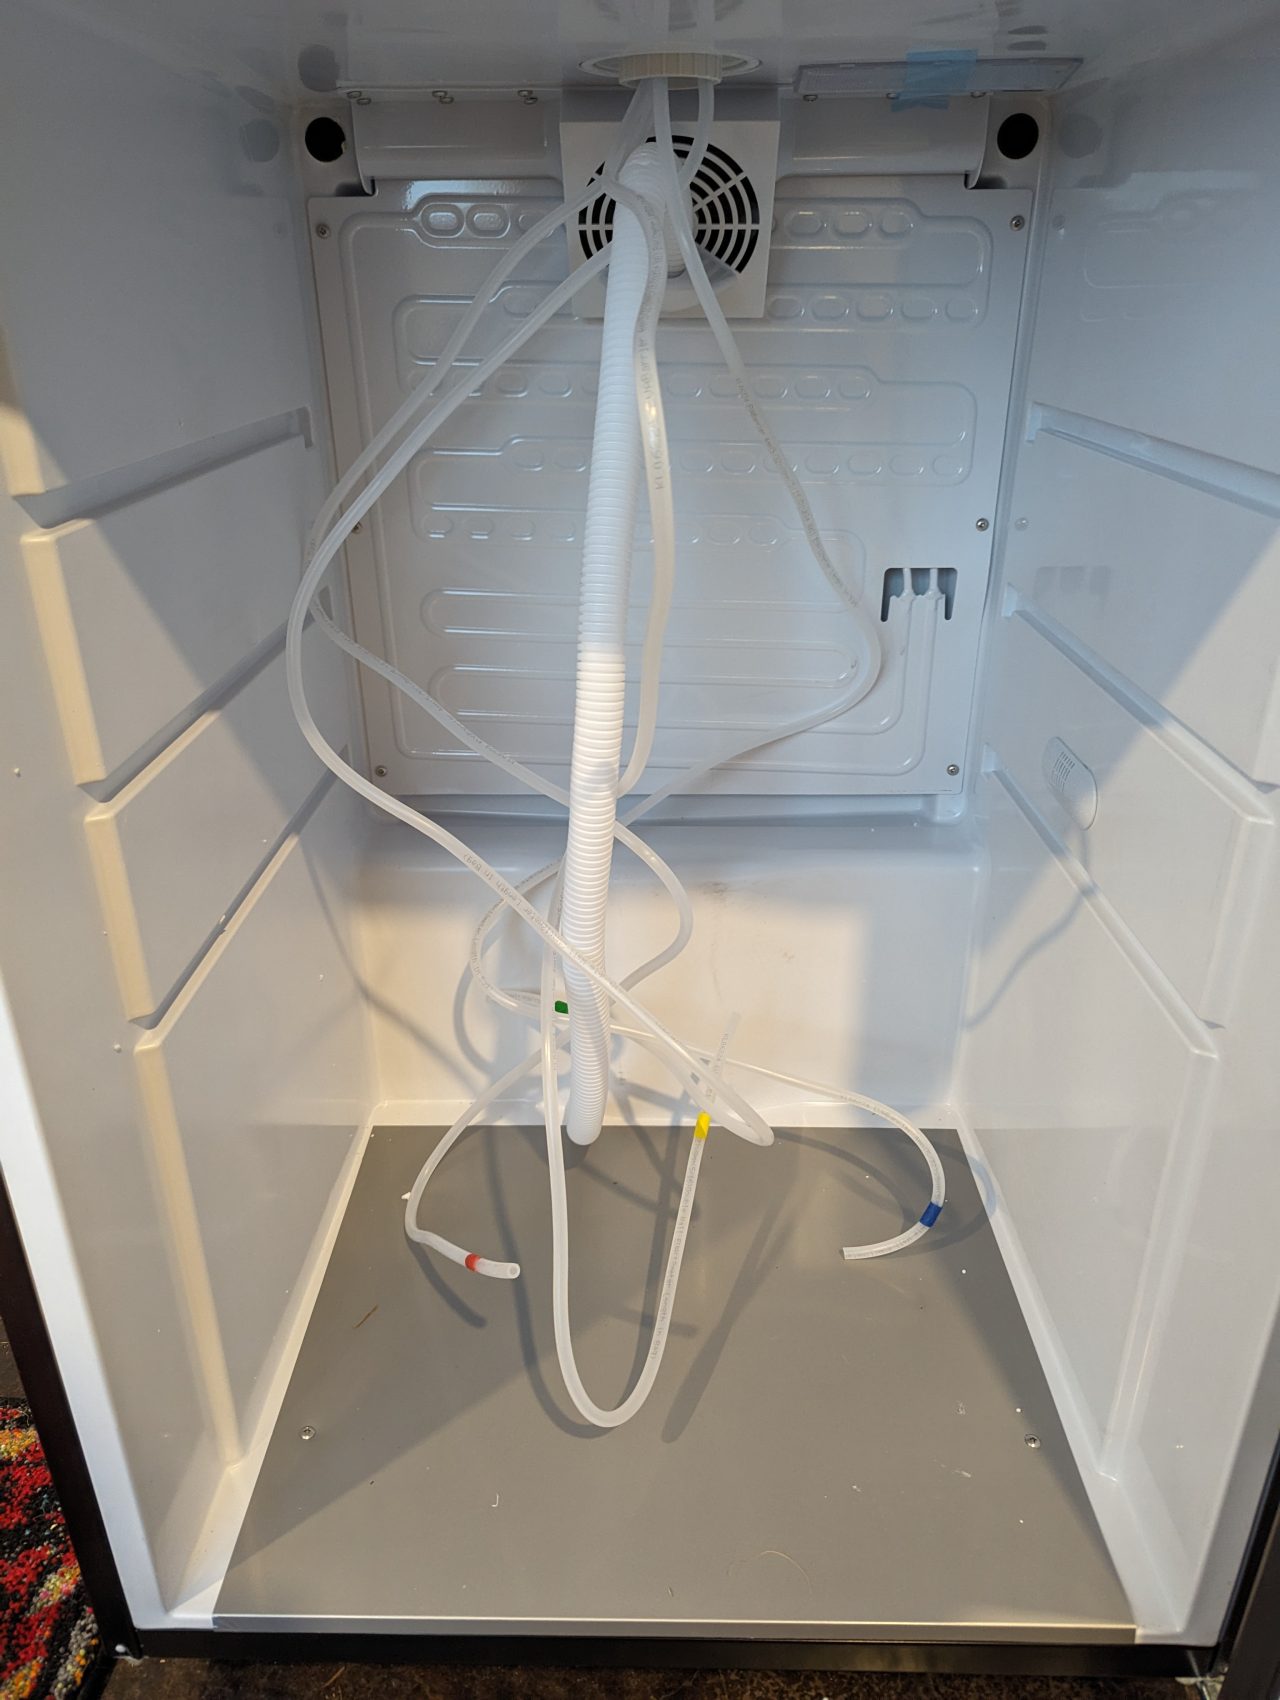
With the lines cut, I used a tip I saw mentioned in a couple of different YouTube videos and wrapped a ring of colored masking tape around both ends of each line so I could easily know which line in the kegerator goes to which tap. You could use the same color masking tape and a Sharpie to number the lines, or just use a Sharpie on the line itself I suppose, but I thought this was a pretty handy way to do things. The way my brain works I did red, green, blue, then yellow from left to right.
Next, feed the beer line up through the kegerator into the tower. I first tried feeding the line down through the tower into the kegerator but since the EVABarrier tubing is a little stiff and the inside of the tower starts getting pretty crowded as you add more lines, I found going up through the kegerator to be way less painful.
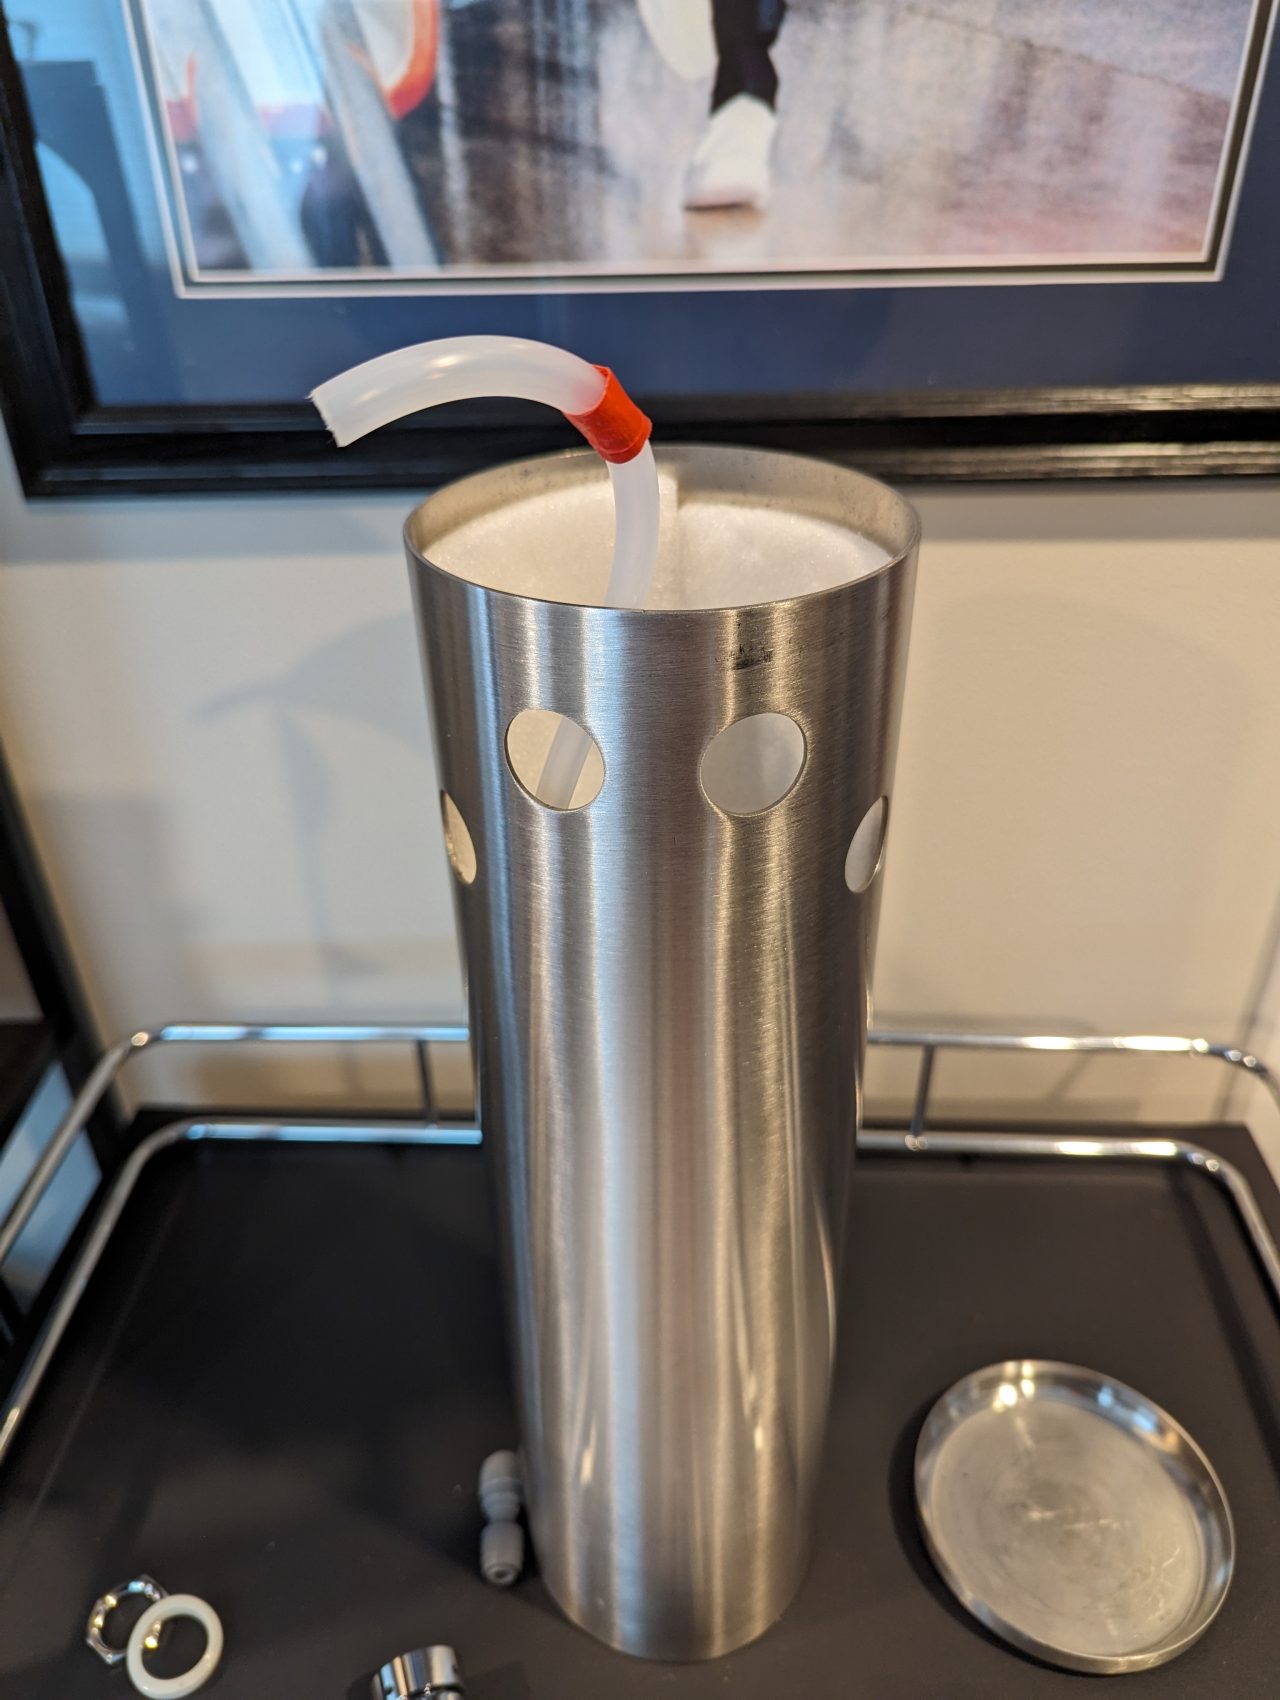
I started with the lower left tap and did each line all the way through, including installing the shanks, since things get more crowded as you go.
Installing the Shanks
To install the first shank, remove the nut and white collar and insert the curved tube coming from the back of the shank into the small end of one of the provided Duotight reducers. Make sure and shove the tube into the reducer all the way -- you don't have to force it, but you'll feel it go past two (hence the "Duo" name!) O-rings and then stop. To make sure it's in all the way, pull semi-firmly as if you're trying to pull the reducer back off the shank tube. If the reducer doesn't come back off the shank tube, you're all set.
Next, pass the shank nut and white collar (IN THAT ORDER!) over the beer line. The order is important here! You want the white collar to be up against the inside of the tap tower, and the nut is then tightened onto the shank thread to secure the shank to the tower.
Feed the beer line through the appropriate hole in the tower (again, starting with the lower left hole), and insert the beer line into the open end of the Duotight reducer that is attached to the shank. Again, make sure you feel two "clicks" as it passes through the two O-rings in the reducer, and give it a quick tug to make sure it's secure.
Finally, feed the shank thread and attached Duotight reducer and beer line back through the hole in the tap tower, and using the provided shank wrench, tighten the shank nut to secure the shank to the tower. Note that you'll want the convex part of the outside shank collar at the top and bottom to fit against the curve of the tower, and the concave part of the white collar on the inside at the top and bottom.
You don't have to really crank this down, but you'll want to tighten it enough that there's as little space as possible between the shank collar and the tower.
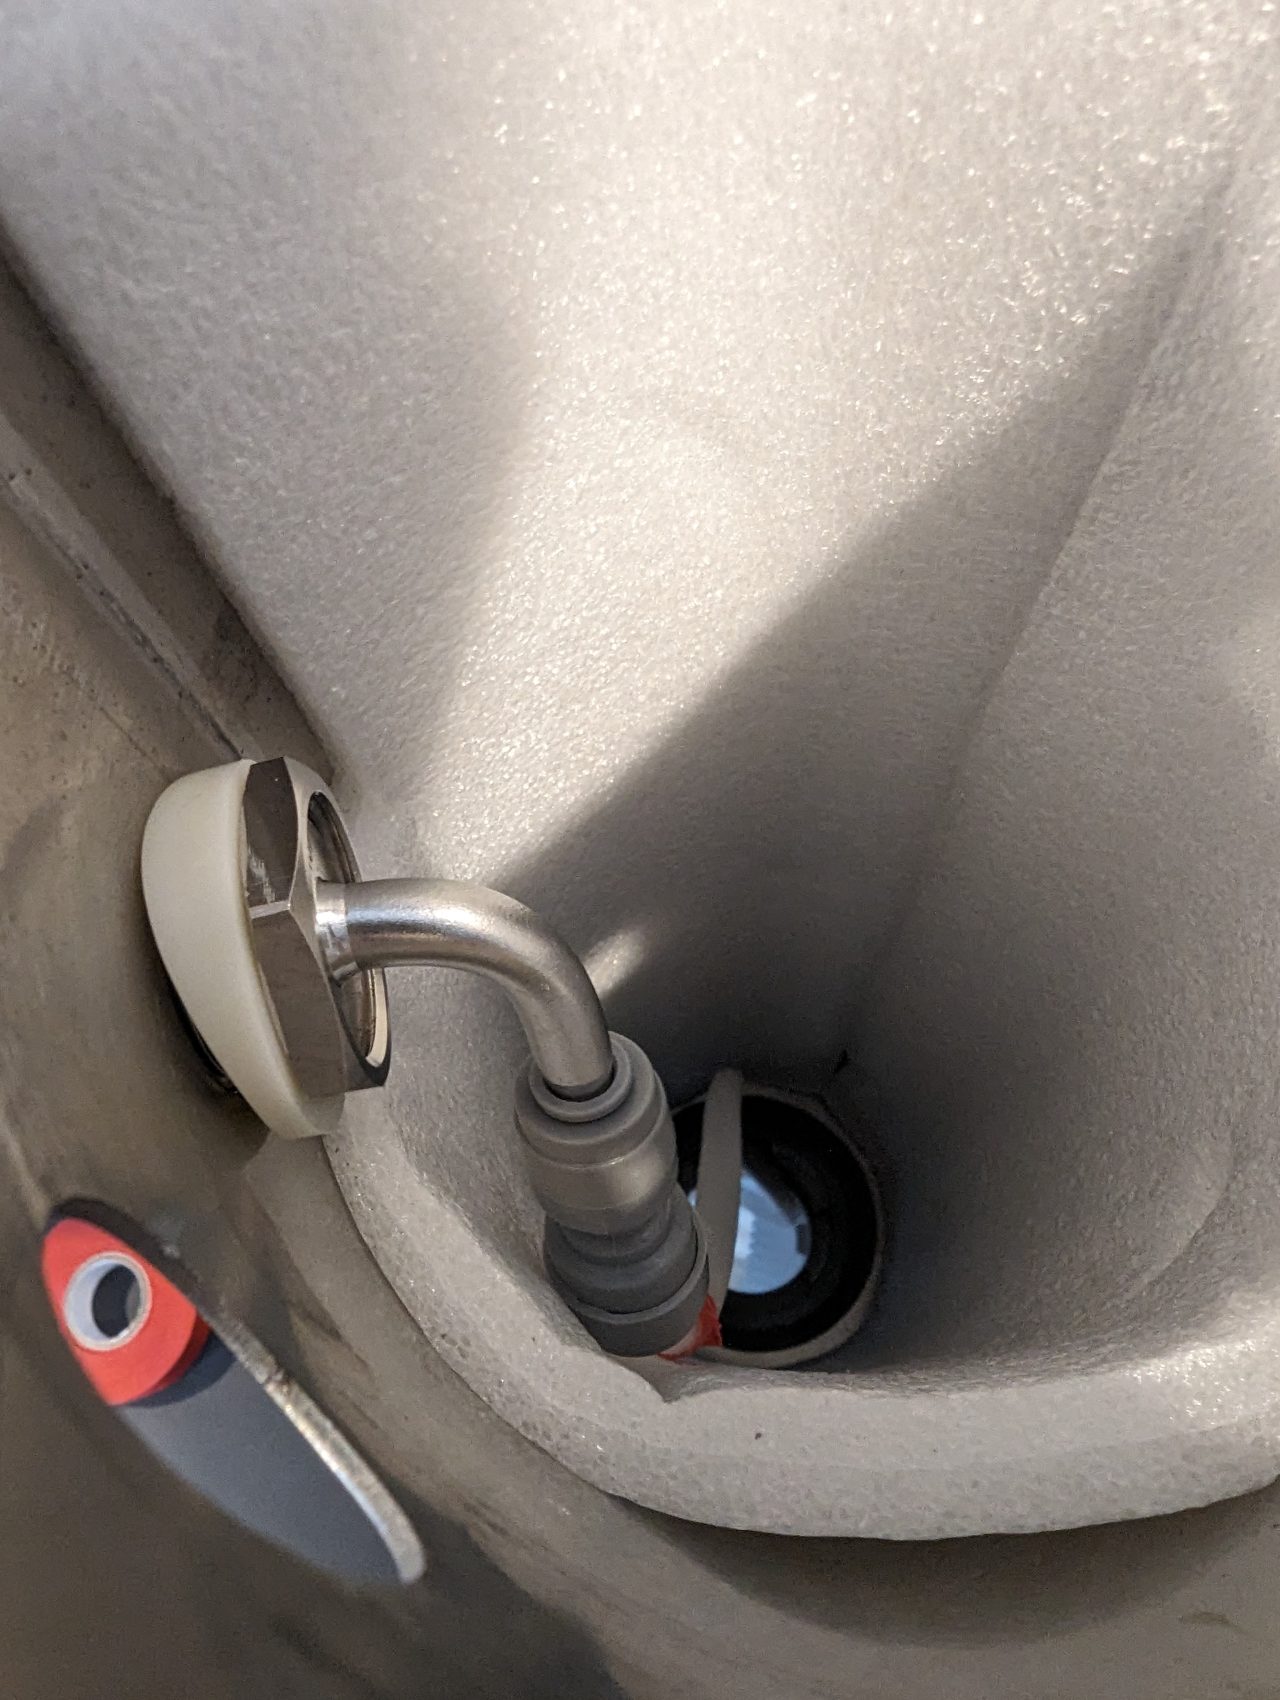 Inside of tower with shank nut and collar, not fully tightened
 Outside shot of first shank installed
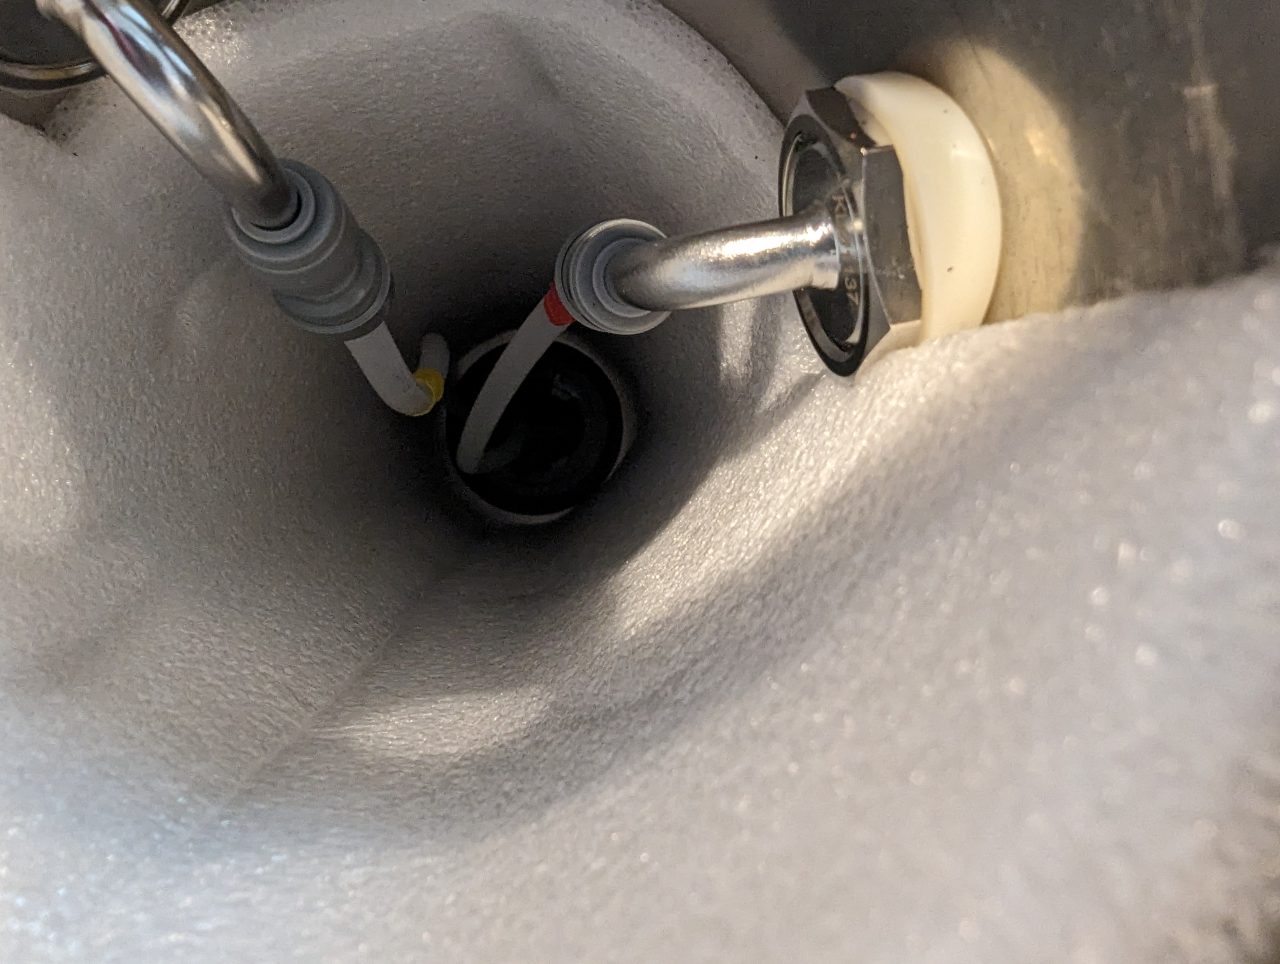 Inside the beer tower with the second shank installed
 The first two shanks installed
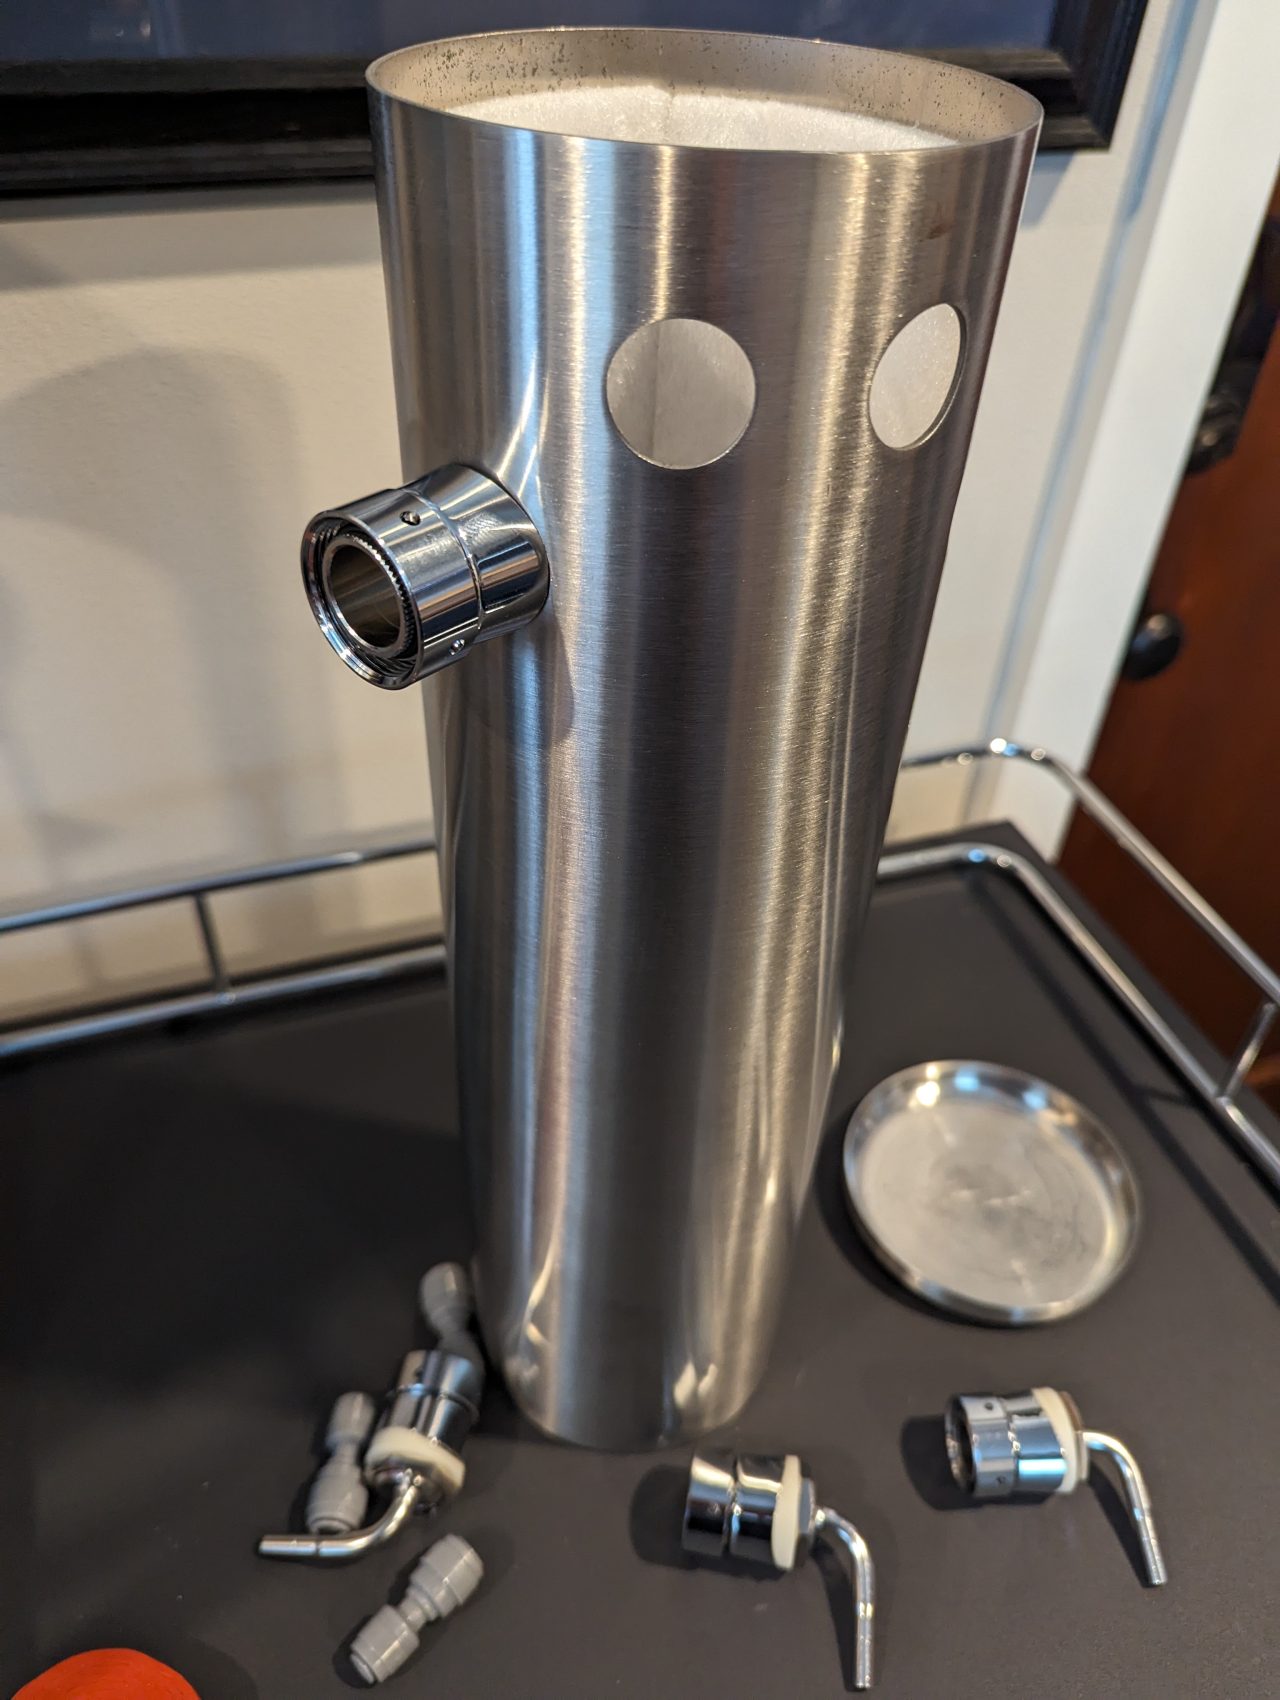
 All four shanks installed
 Inside shot with all four shanks installed
 The marked beer lines, awaiting kegs and beer
At this point it's lather, rinse, repeat for the other three lines. I installed the lower-right shank second because once the top shanks are in it gets more difficult to tighten the lower shanks.
Installing the Faucets
This is one of those assembly processes that gets easier as you go. The next step is to install the faucets, which is a matter of placing the faucet onto the shank and tightening the shank sleeve against the faucet.
The assembly instructions indicate that you're supposed to tighten the faucet to the shank with the supplied wrench, but since the sleeve is completely round that doesn't really work. I do have a pair of pliers with nylon grips that might work for this without damaging the sleeve, but -- and hopefully this doesn't come back to bit me -- hand-tightening seems plenty adequate here.

Installing the Tap Handles
And the easiest step comes last -- installing the tap handles! In anticipation of this day while we were remodeling our house and building the garage/brewing space, my wife got me four custom Irondale Brewing tap handles for my birthday, and today's the day they finally get installed!
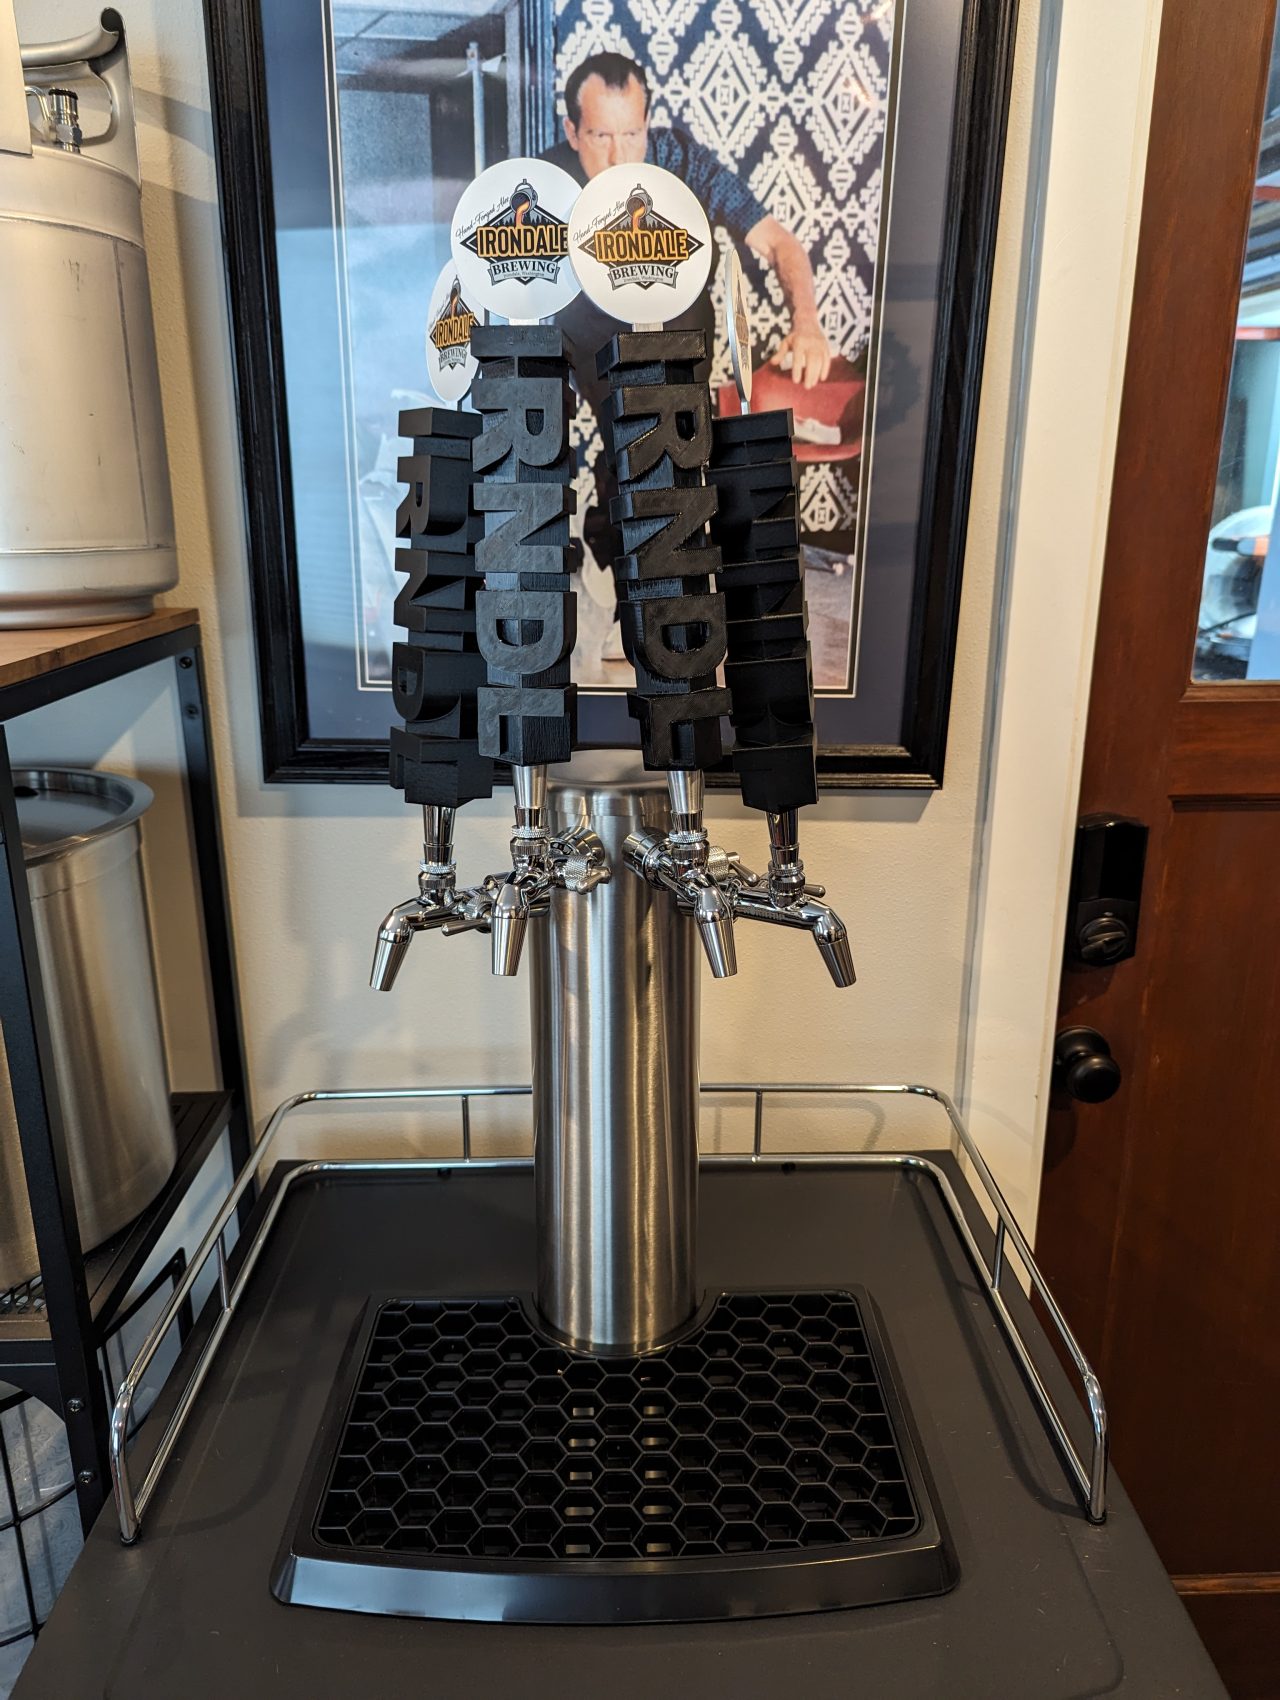
Given the size of the handles and the rather tight grouping of the faucets they're maybe a tad crowded, but the faucets all seem to close completely so I should be in good shape.
VERY exciting to see this all come together and get to this point!
What's Next?
Of course to be able to actually serve beer we'll need to install the gas lines. The kegerator ships with almost everything you need, including a nice dual-gauge regulator (and two washers!), EVABarrier gas line, and threaded ball lock quick disconnects for both the gas and beer connections.
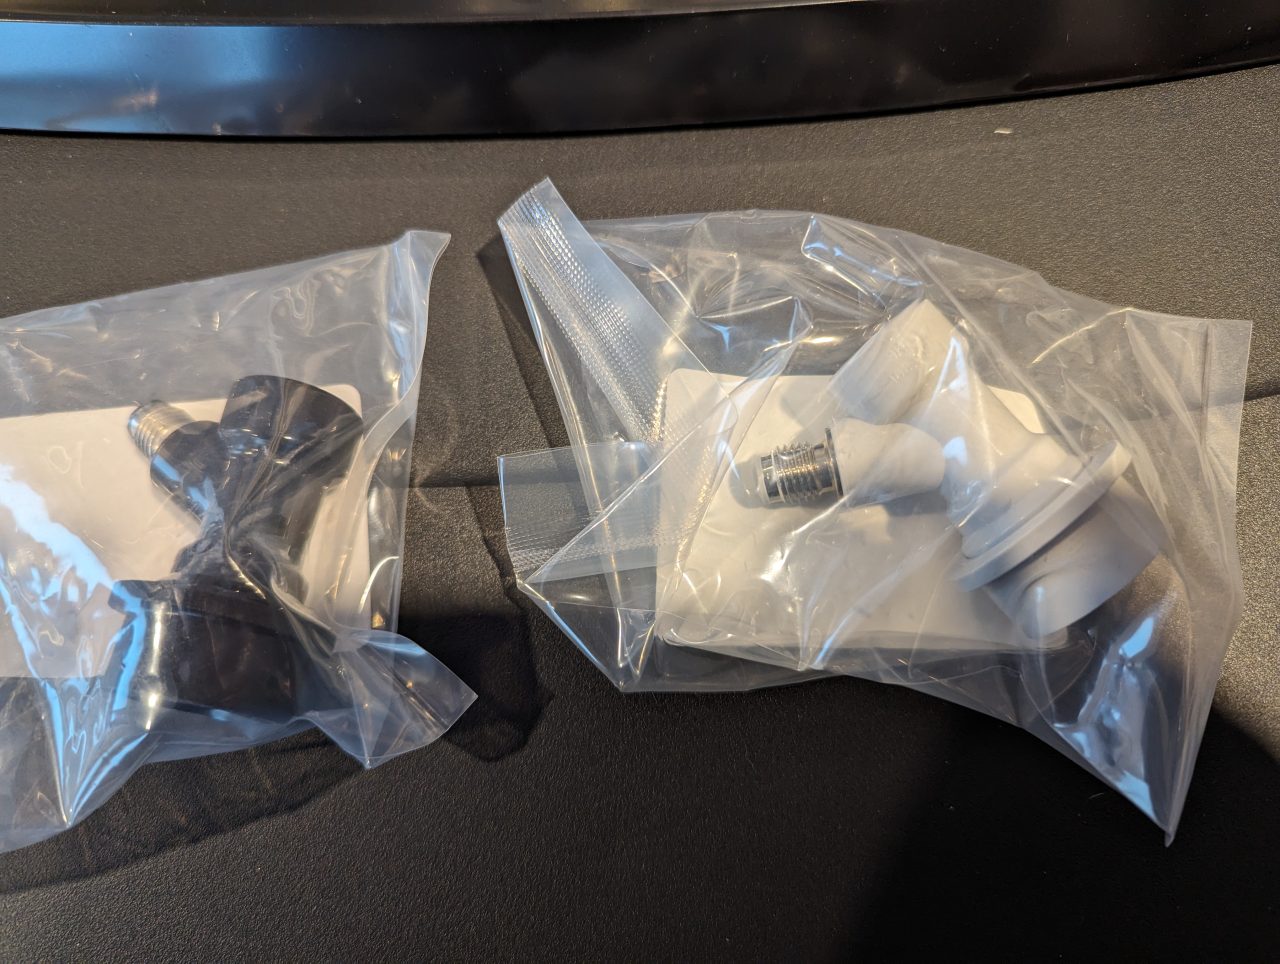
This all would work fine (save one thing they really should include that I'll cover in my next post), but since I can't leave well enough alone I decided I wanted to go full Duotight wherever possible so I had to (yes, had to) order Duotight ball lock quick disconnects for all the gas and beer connection points, as well as a reducer to be able to use a quick disconnect carbonation cap on the back of the kegerator.
Those arrive in a few days at which point I'll be able to finish the assembly.
And I suppose I'll need some beer too so the new kegs aren't so sad. An empty keg is a sad keg, after all.

Soon, little kegs. Soon.