Fermentation Chamber Buildout
As John Palmer so eloquently puts it in How to Brew, "A good fermentation of a bad recipe is going to make a better beer than the bad fermentation of a good recipe," and one of the biggest ways to create the environment in which a good fermentation can occur is by controlling fermentation temperature.
Without getting into all the potential fancy fermentation schedules of specific beer styles, more than anything you want your fermentation temperature to be 1) within the range of the yeast you're using; and 2) STABLE. Your beer will be much happier at a stable temperature that's slightly higher or lower than ideal than it will be with wide swings in temperature during fermentation.
To this end I decided it was time to create a proper fermentation chamber. My brewing space is well insulated and has a mini-split so I can keep the ambient temperature in the space reasonably stable, but between the temperature fluctuation tolerance of the mini-split, the hot and cold spots in the room based on the airflow at any given time, and the changes in temperature as doors to the outside and the neighboring connected garage space are opened and closed, it was less than ideal to be fermenting in the brewing space.
Here's a quick video tour of the end result! Read on for more details and photos.
Fermentation Chamber Options
For quite a while I considered getting a RAPT Fermentation Chamber. It's purpose-built for fermenting, it has a temperature range of 28 F - 122 F, and has cool WiFi connectivity for remote monitoring and programmability.
But, it's $1300. And since I had just purchased the new kegerator, I thought I'd slow my roll and go with a DIY solution.
For the DIY approach you can do this SUPER cheaply by getting a chest freezer. Even new these will only run you a couple hundred bucks, and depending on where you live there are always cheap or free ones available.
Based on the space I had available for a fermentation chamber and the fact that I tend to have several small batches going at once I decided an upright freezer would give me more room and be a bit more flexible (and convenient) than a chest freezer, so when I saw a deal on a 13 cu ft Frigidaire garage-ready upright freezer that fit perfectly (and I mean perfectly) in the designated corner of the garage, I pulled the trigger.
It was delivered last month and I finally got a chance to add all the necessary components this past weekend. As of two days ago it's currently keeping its first batch of beer happily fermenting at a very stable ~68 F.
Transforming the Freezer Into a Fermentation Chamber
The freezer acts as the foundation for the fermentation chamber by giving you two vital things:
- A well-insulated, dark chamber for your fermenters
- Cooling
To that foundation, at a minimum you need to add:
- A heat source
- A temperature controller to trigger heating or cooling as needed to keep the temperature stable
In addition, you'll likely want: 1. A fan to move the air around within the freezer -- this helps avoid hot and cold spots and generally keep the temperature more stable, and also avoids stagnant air promoting mold 2. A dehumidifer, because otherwise you're creating a great environment for mold to grow
Don't cross your fingers and hope you don't get mold. That's what mold wants you to do. You're creating a sealed environment with -- absent a dehumidifier -- high humidity in exactly the temperature range mold loves. Get ahead of it so you aren't kicking yourself later. You're welcome. :)
The Components
Here's what I went with for the necessary components:
- Inkbird WiFi ITC-308 Digital Temperature Controller
- Vivosun 48" x 20.75" Heat Mat
- AC Infinity Multifan S7-P
- Eva-Dry E-500 Renewable Dehumidifer -- The nice thing about this type of dehumidifier is it doesn't require power, doesn't have a fan, and doesn't have a tank you'll need to empty.
- Inkbird IBS-TH3 WiFi Temperature and Humidity Sensor -- This one's optional, but it's a great way to keep tabs not only on the ambient temperature in the chamber itself and, more importantly, the humidity so you'll know when your dehumidifier needs a refresh.
Miscellaneous other stuff I used: * Velcro Dots to mount the fans * Command Strips to mount the fan control and Inkbird temp/humidity sensor inside the freezer * Command Strip Cord Bundlers to hang the fan cables to the ceiling inside the freezer * A Command Strip Hook to hang the Inkbird temperature controller to the outside of the freezer
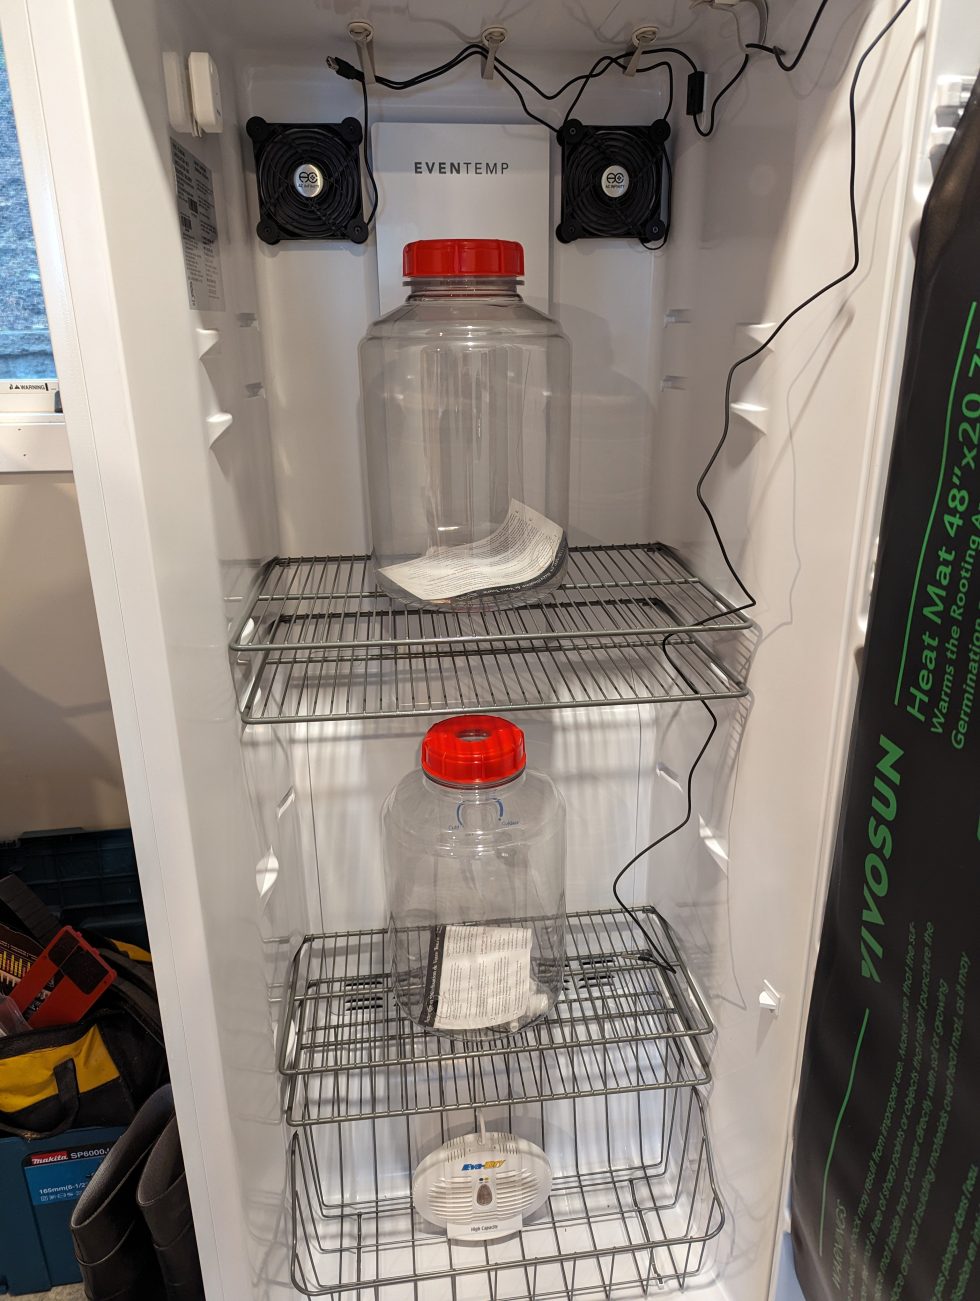
Here's a bit more detail about the components used on the inside of the chamber ...
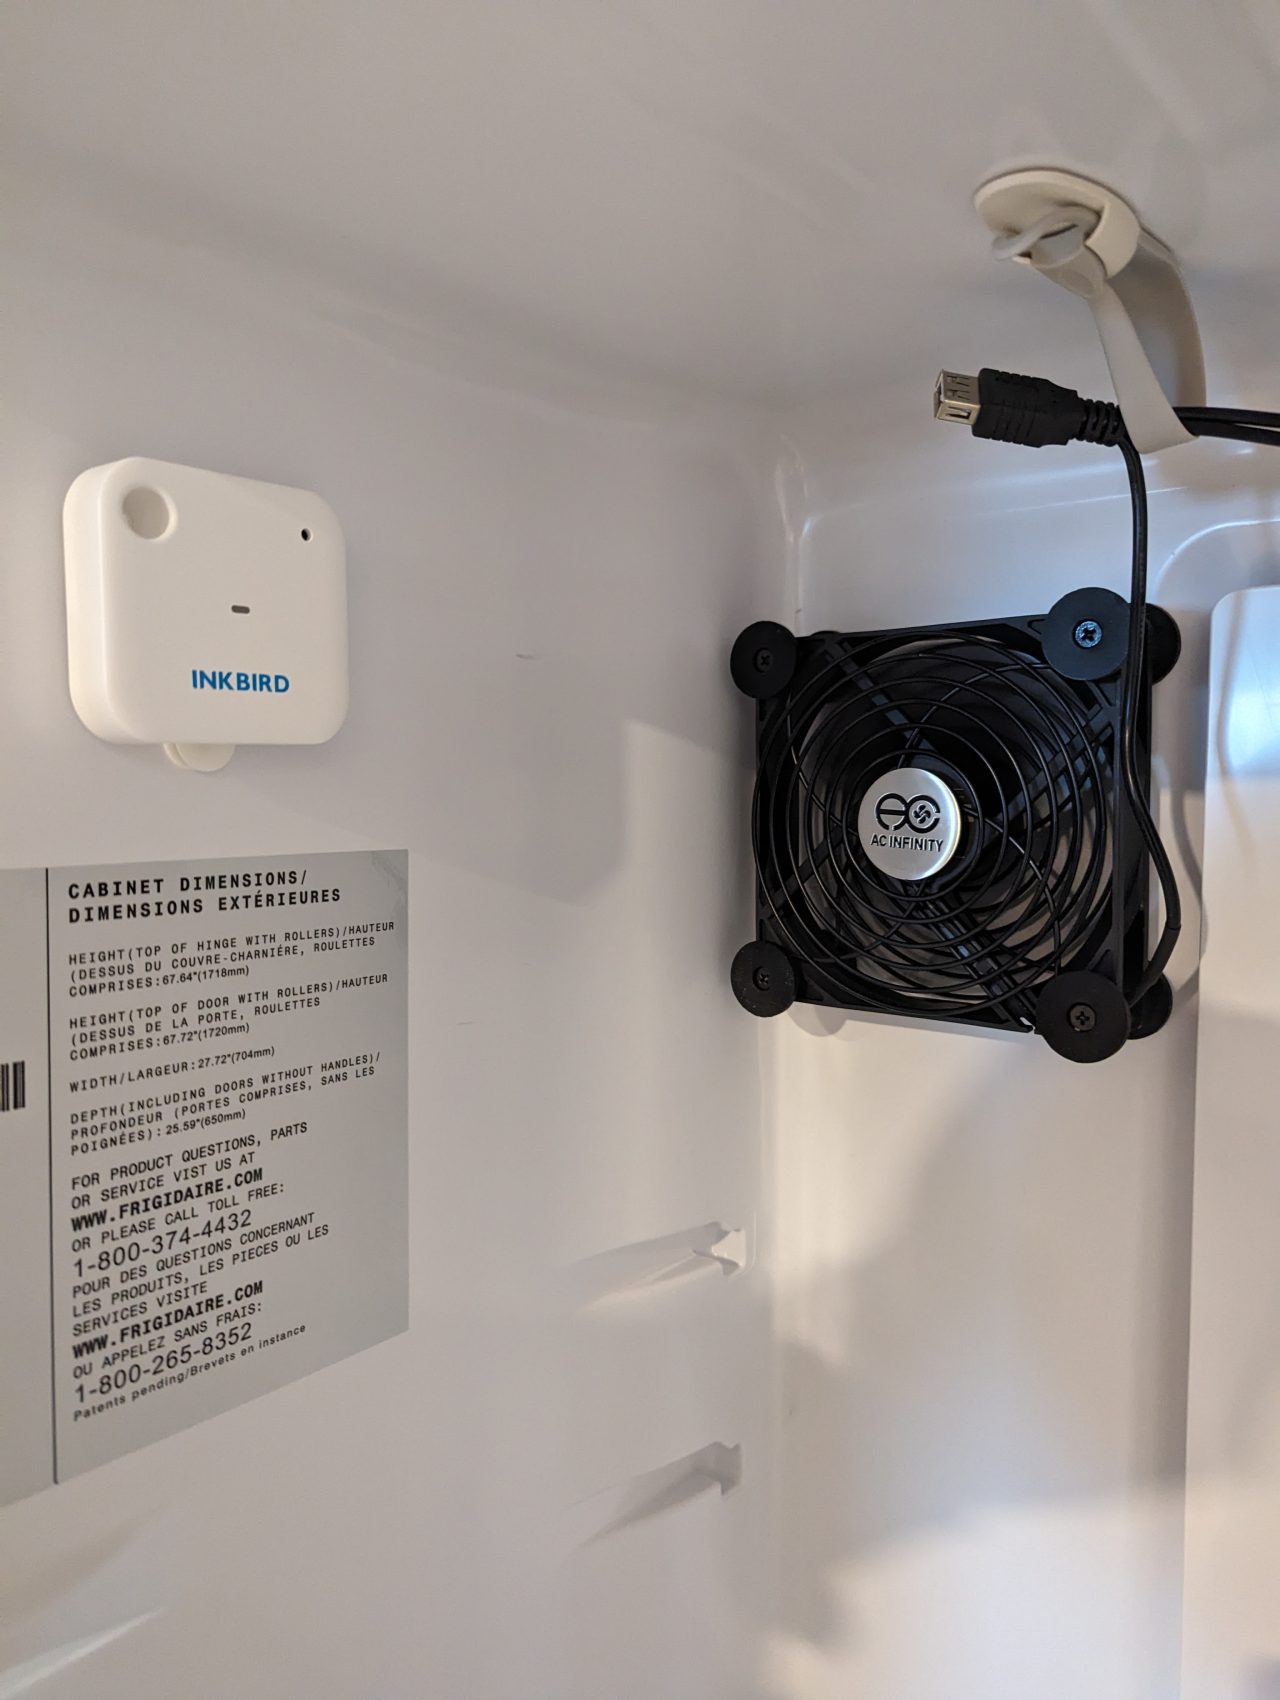
Fans
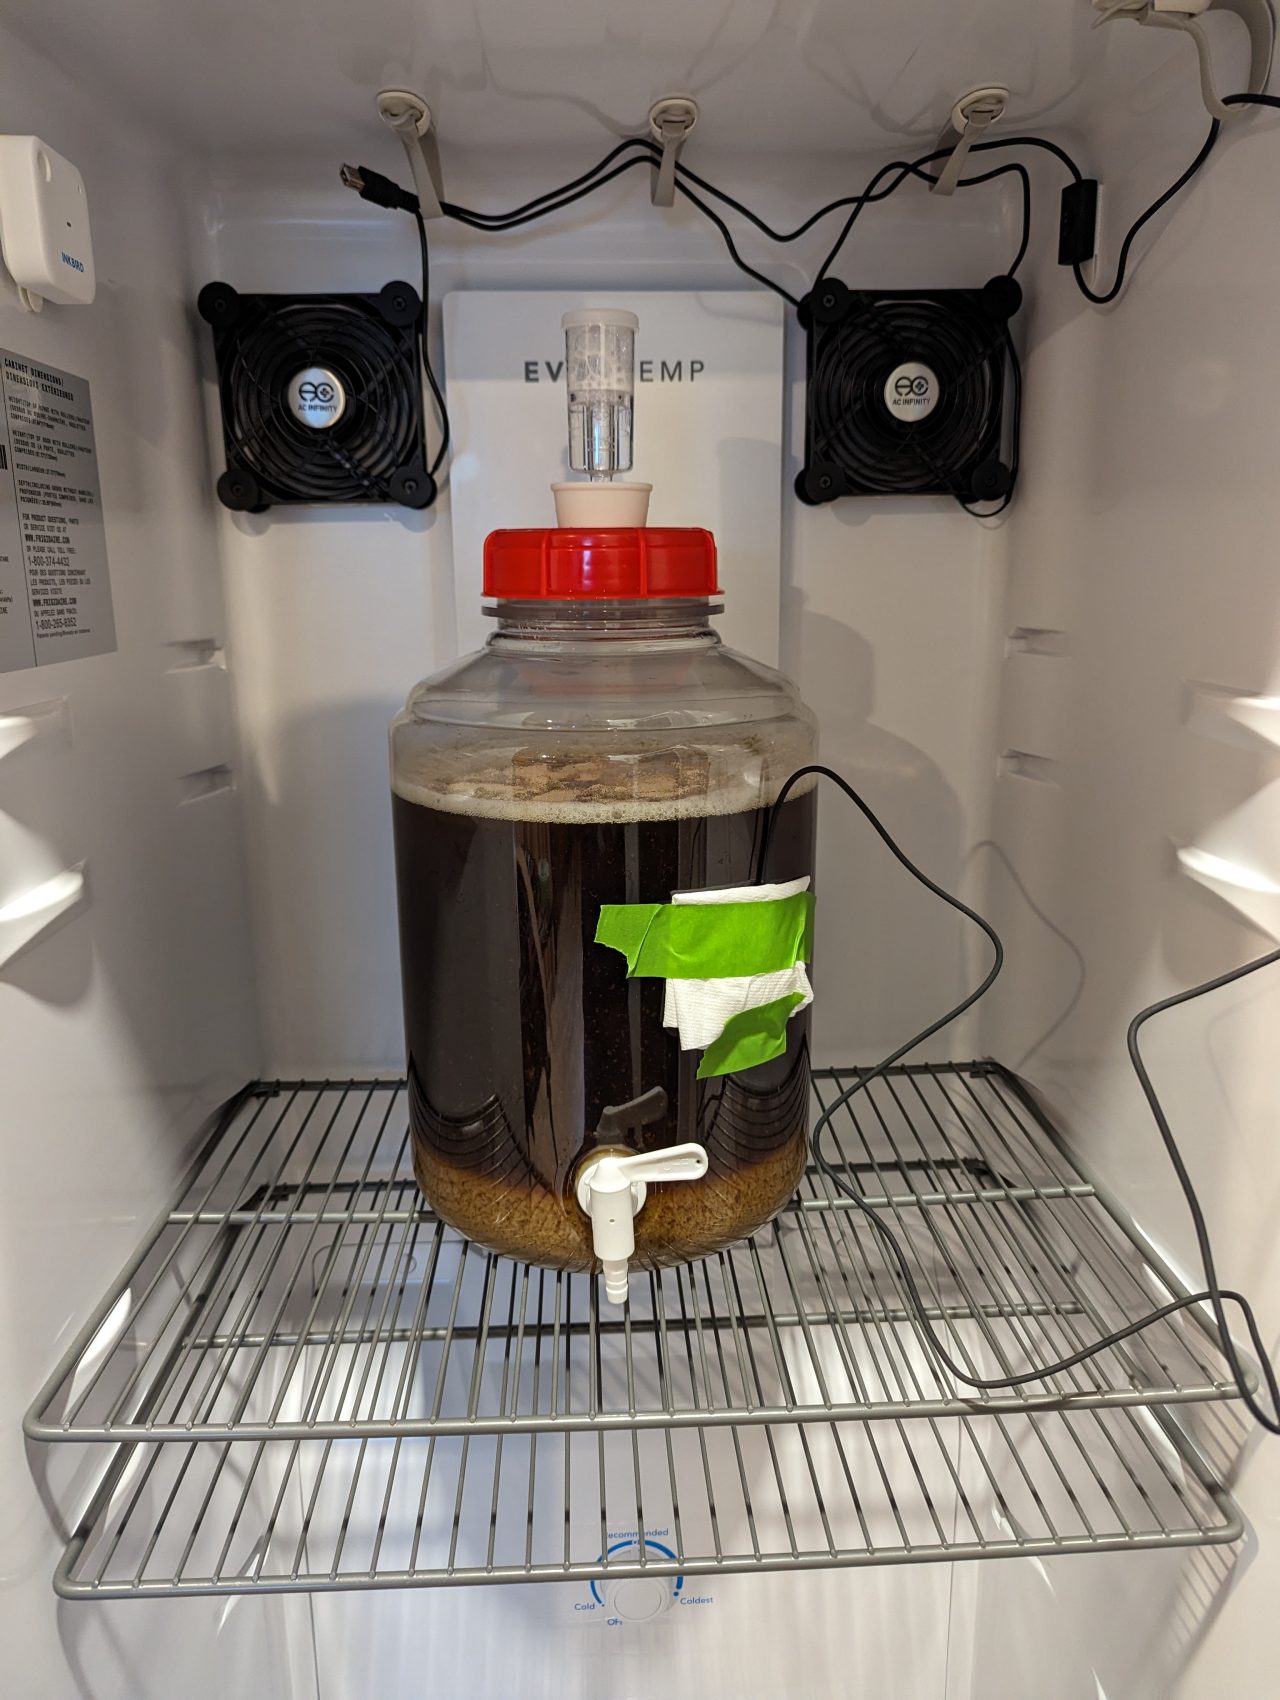
I mounted the fans to either side of the cooling panel on the back wall of the freezer with velcro dots. The fans are light enough that one dot on each foot did the trick.
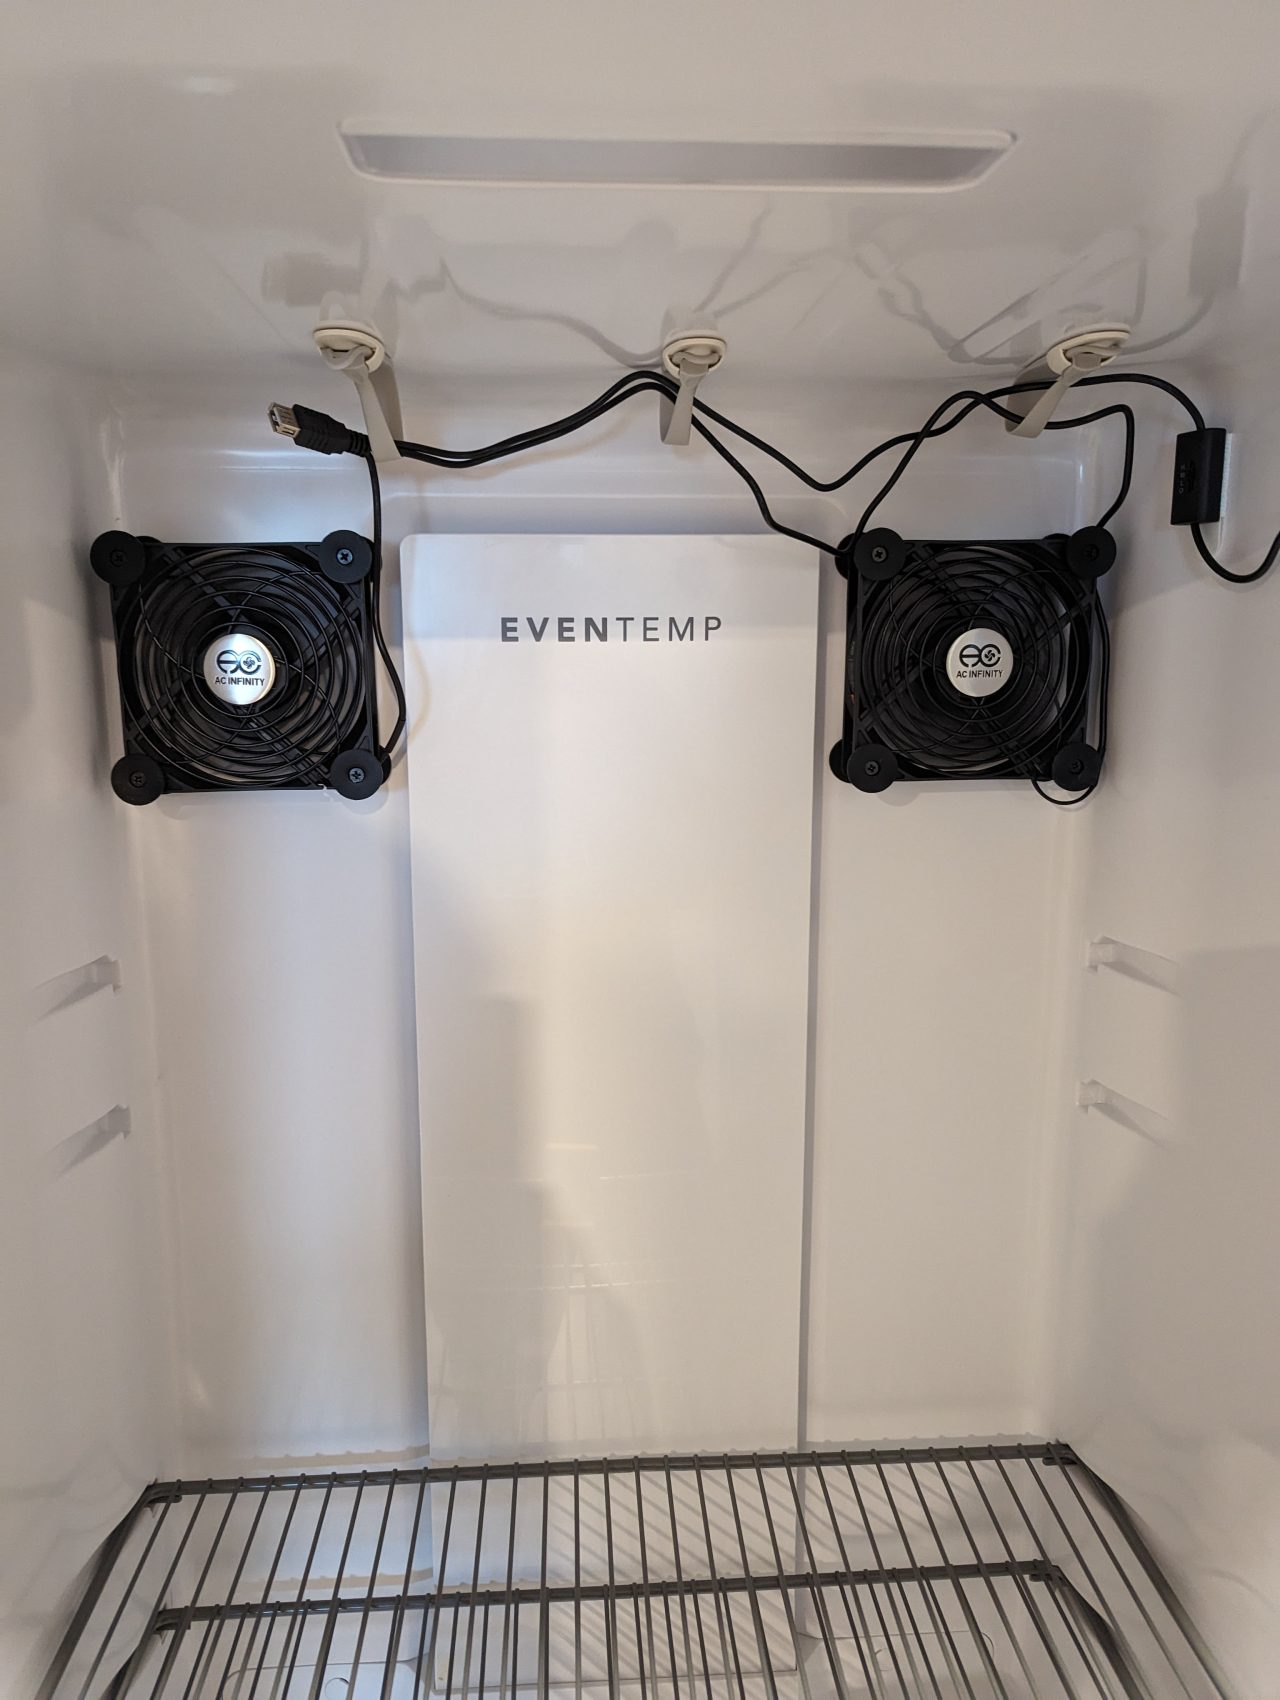
I used Command Strip Cord Bundlers to hang the wires. It isn't quite as tidy as some of the cord management I've done for computer and audio equipment, but it does the job of getting the wires up and out of the way. On the right, I mounted the fan speed control to the wall with a Command Strip.
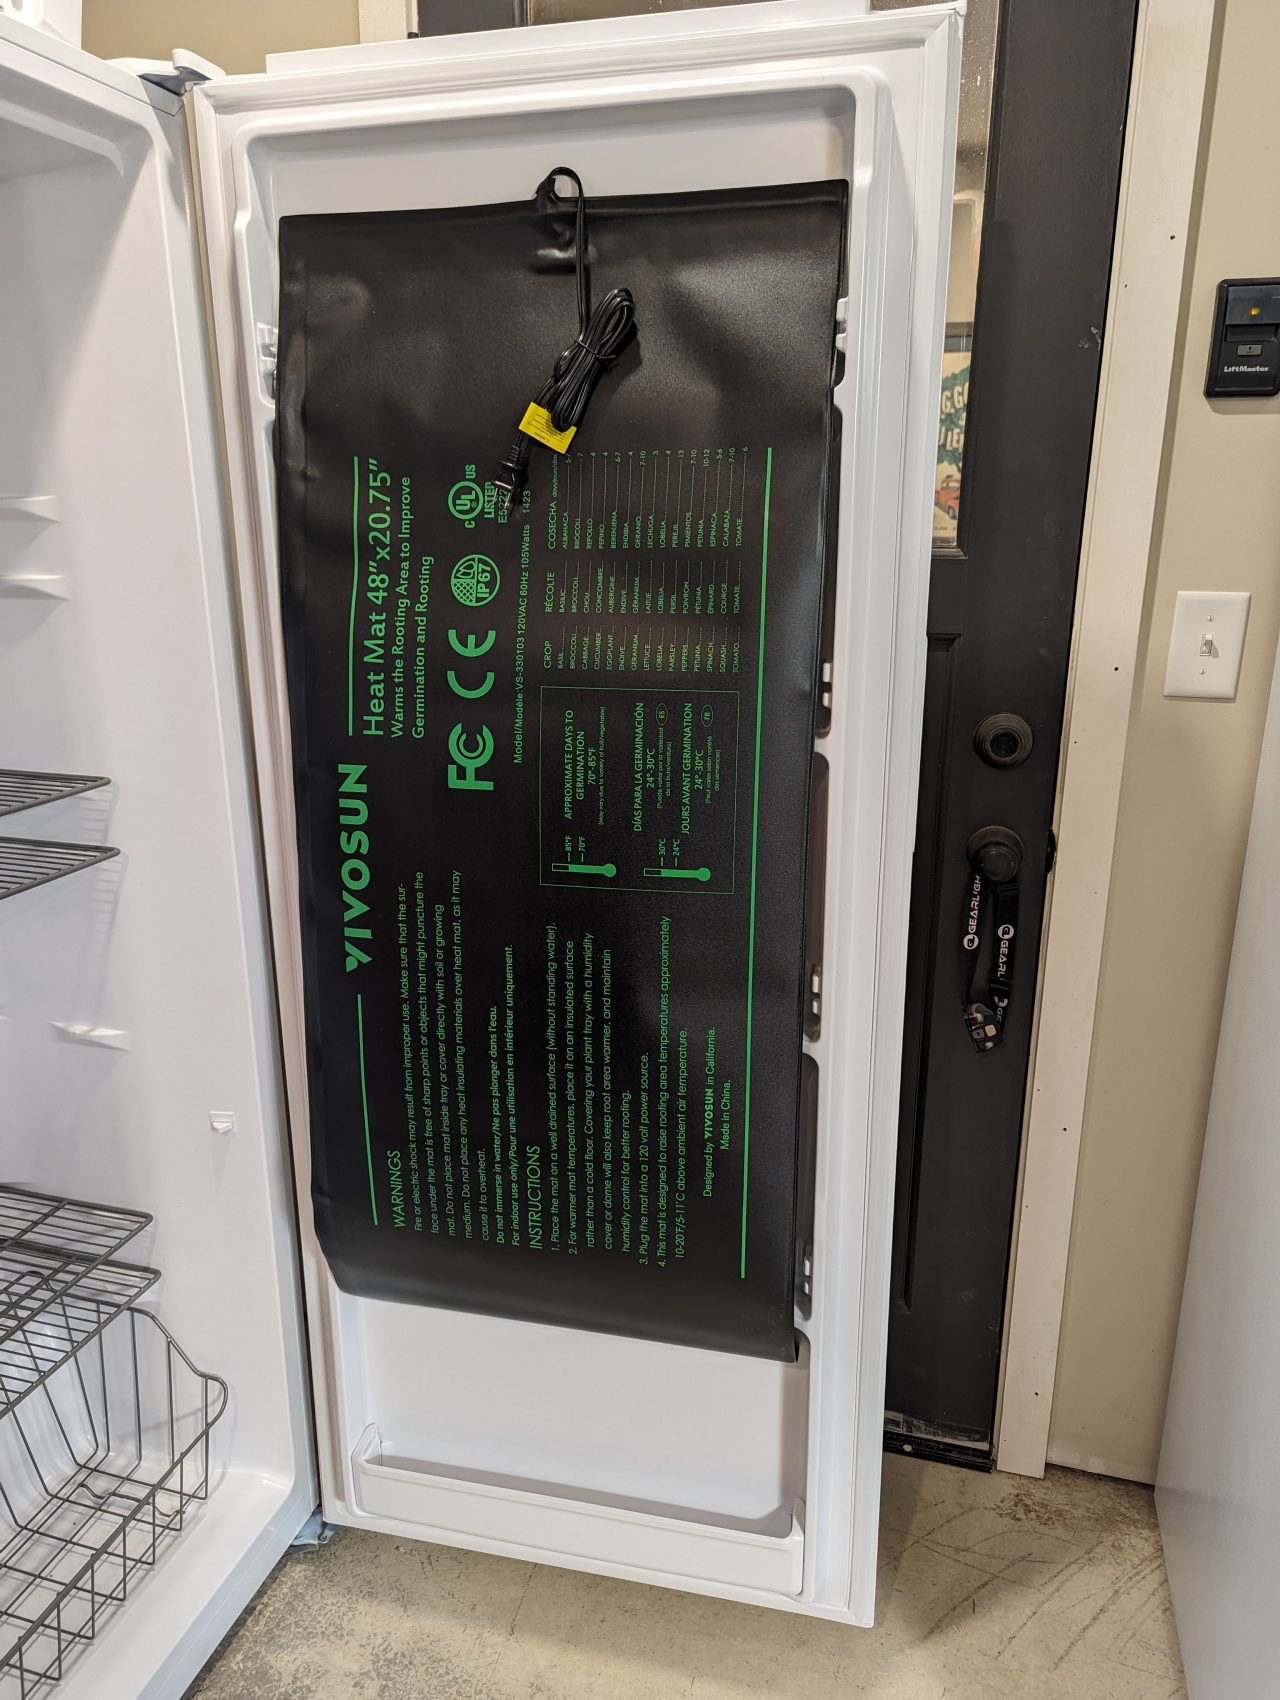
Heating Mat
This 48" x 20.75" heating mat is probably overkill for what I need. I doubt it has the juice to raise the temperature up to the higher range of Kveik yeast temps, but it's doing a more than adequate job of keeping things at ale yeast ranges without having to run much at all. I'm in the relatively temperate (most of the time) Pacific Northwest; your mileage may vary.
While there are several options for heat sources including things such as ceramic heat lamps for lizard enclosures, I went with this large heat mat to mount to the inside of the door operating under the theory that I'll get good radiant heat across most of the height of the freezer, which will be helpful for when I have more than one batch going.
To mount the mat, which is a bit heavy, I used industrial velcro across the width of the mat at the top, and a couple of the velcro dots at the bottom to attach the bottom of the mat to the door so it doesn't swing around when the door is opened.
I have some temperature charts below but with temps getting down into the 40s here at night, the heating pad is barely needing to run to keep the temp nice and stable in the chamber.
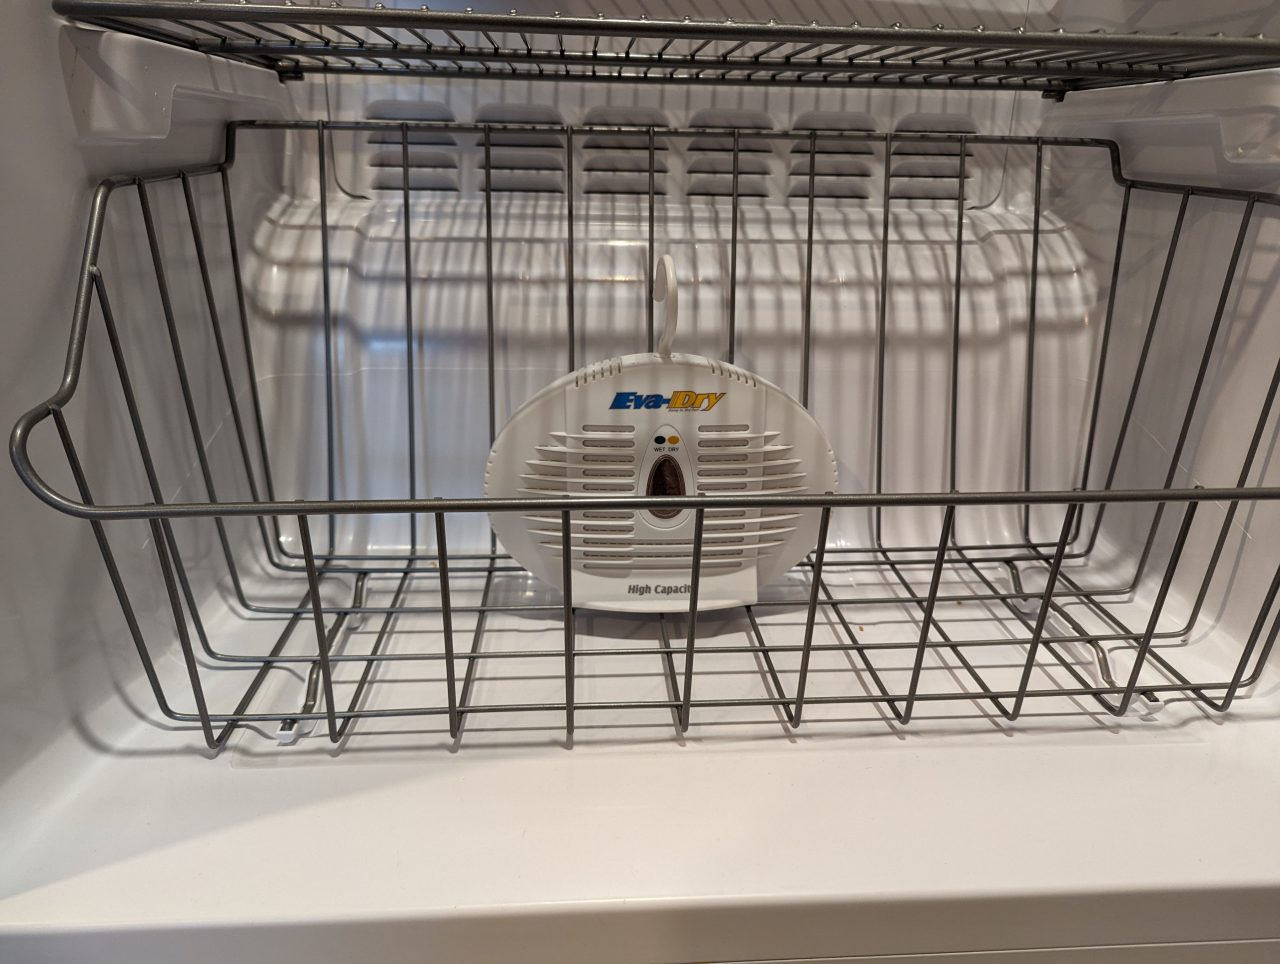
Dehumidifer
The dehumidifer has a hook on the top so it could be hung on one of the walls with a command strip hook, but since that bottom basket isn't particularly useful, and since (I'm assuming) the position of the dehumidifier doesn't have much impact on the functionality, I just tossed it in the basket at the bottom of the freezer.
When I had the door open for a couple of hours to work on all this it was a pretty rainy day here and the humidity was about 70% according to a ThermoWorks RH Spot, but after I had the door closed for an hour or so the humidity was down to about 40%.
Inkbird IBS-TH3 WiFi Temperature and Humidity Sensor
Again, this is optional, but I love these little WiFi Inkbird sensors so I figured I'd mount one to the inside wall with a command strip.
I set a humidity alarm at 60% so when the humidity gets a bit too high I'll know it's time to recharge the dehumidifier. I also have a second dehumidifier so I can swap a fresh one out when one needs to be recharged. Belt and suspenders.
Inkbird WiFi ITC-308 Digital Temperature Controller
Moving to the outside, I hung the brains of the system -- i.e., the Inkbird temperature controller -- on the wall of the freezer with a command strip hook.
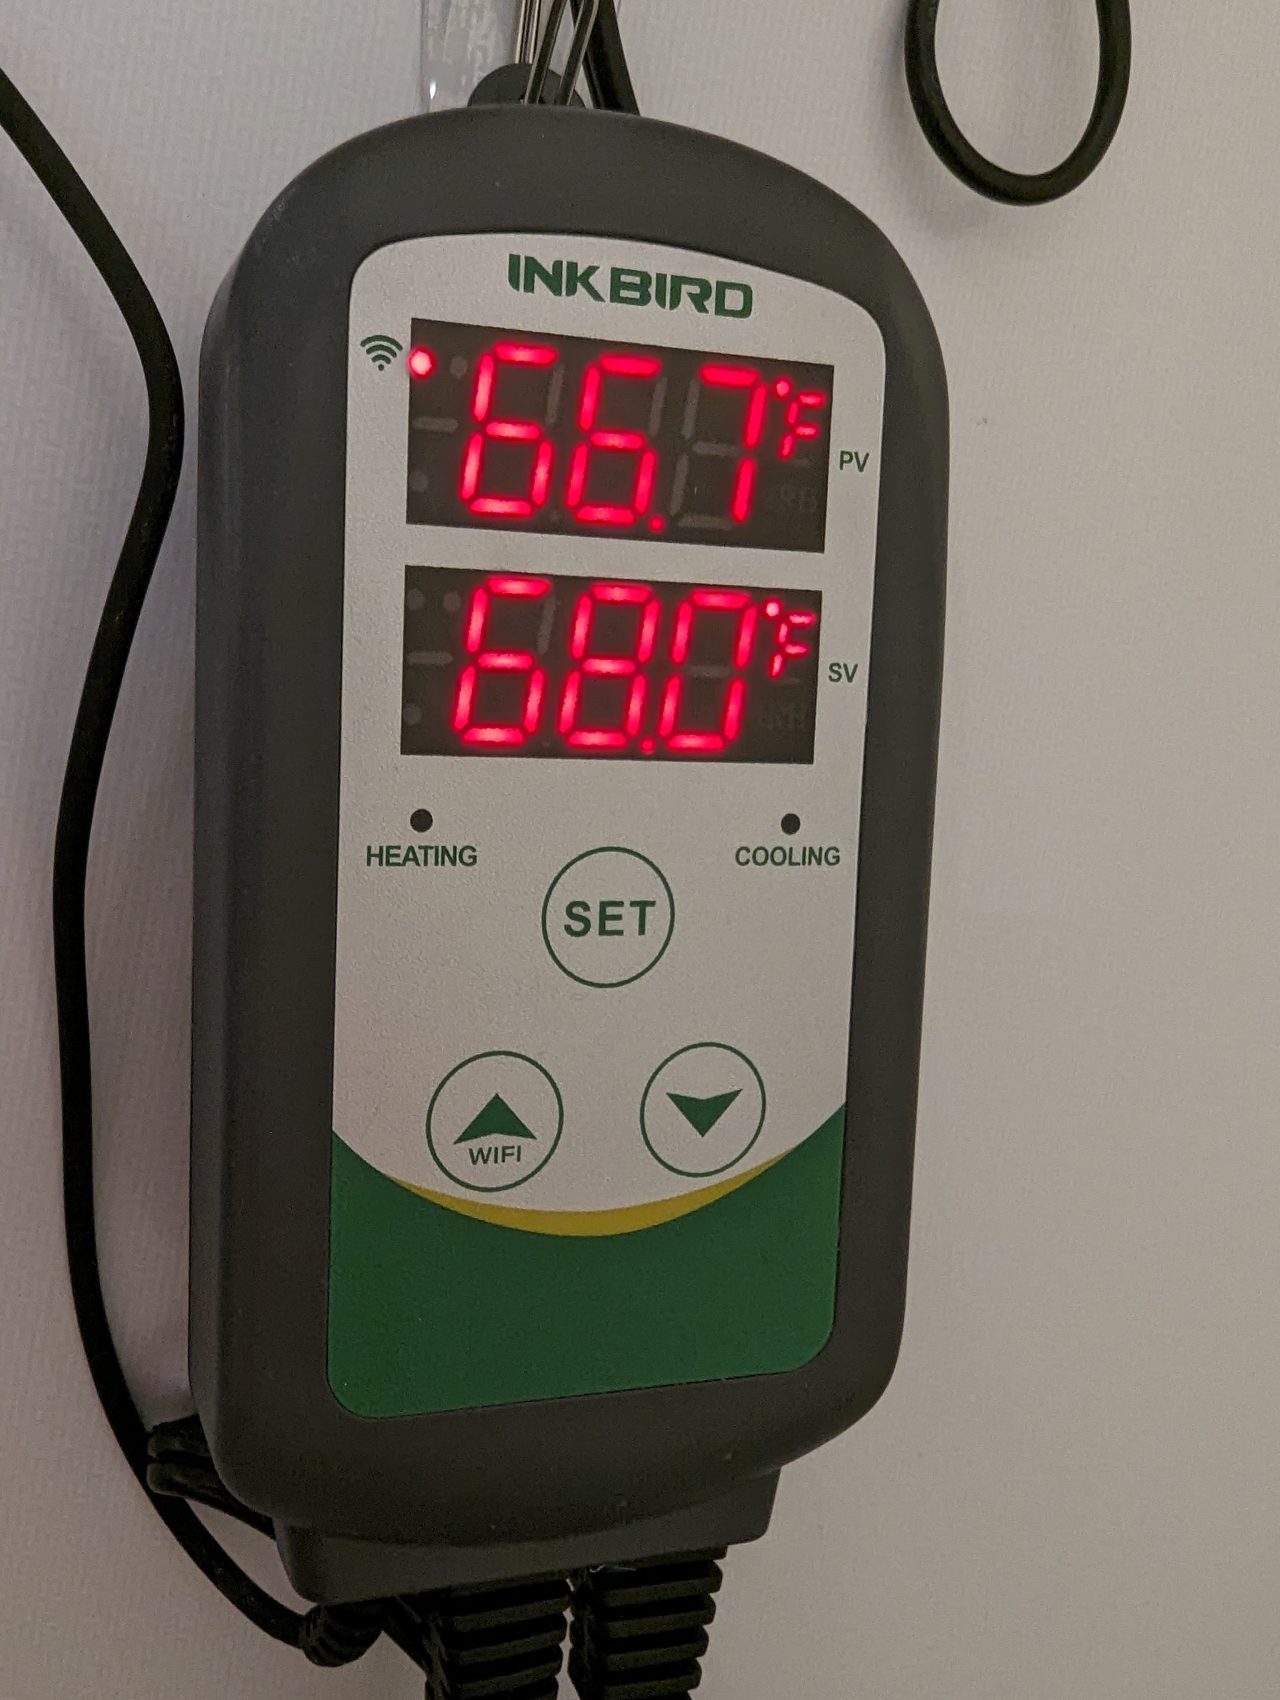 The brains of the fermentation chamber
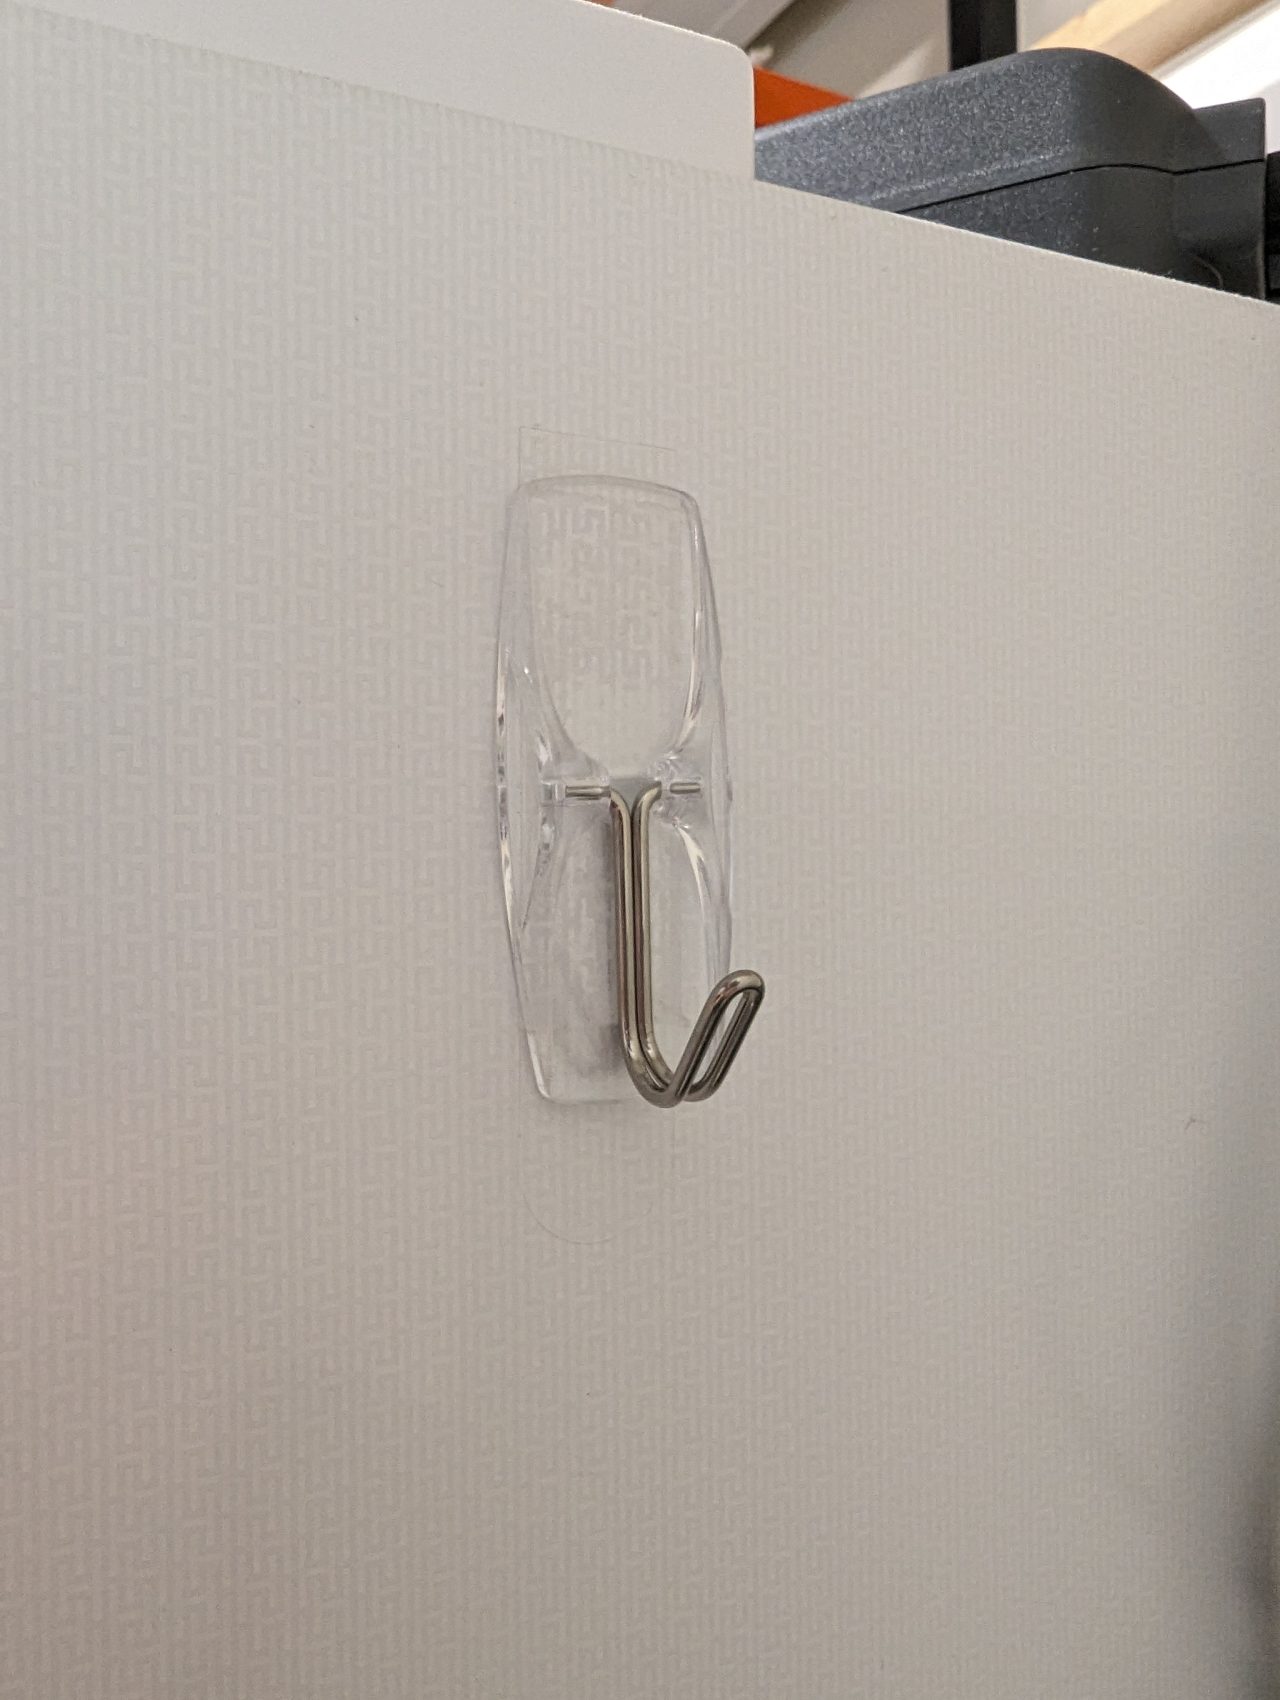 Small command hook to hang the temperature controller
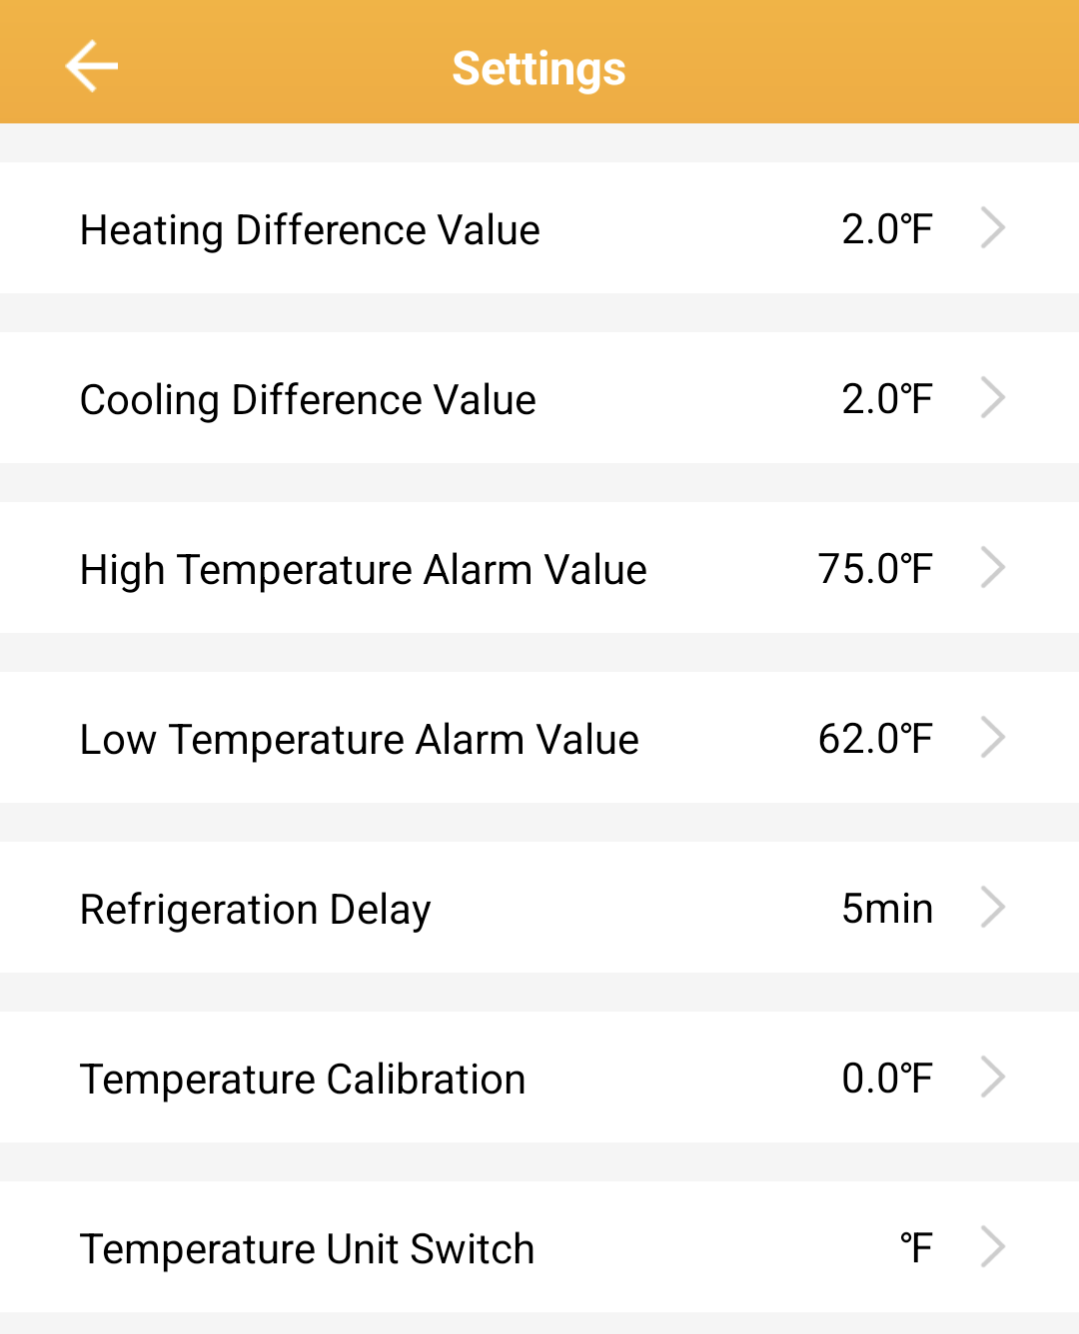
The functionality of these controllers is pretty simple. There are two electrical plugs, one for the cooling source and one for the heating source, and based on the desired temperature the controller powers up the appropriate heating or cooling source long enough to keep the temperature close to the desired set point. The temperature controller "knows" the current temperature via a probe that is fed into the chamber.
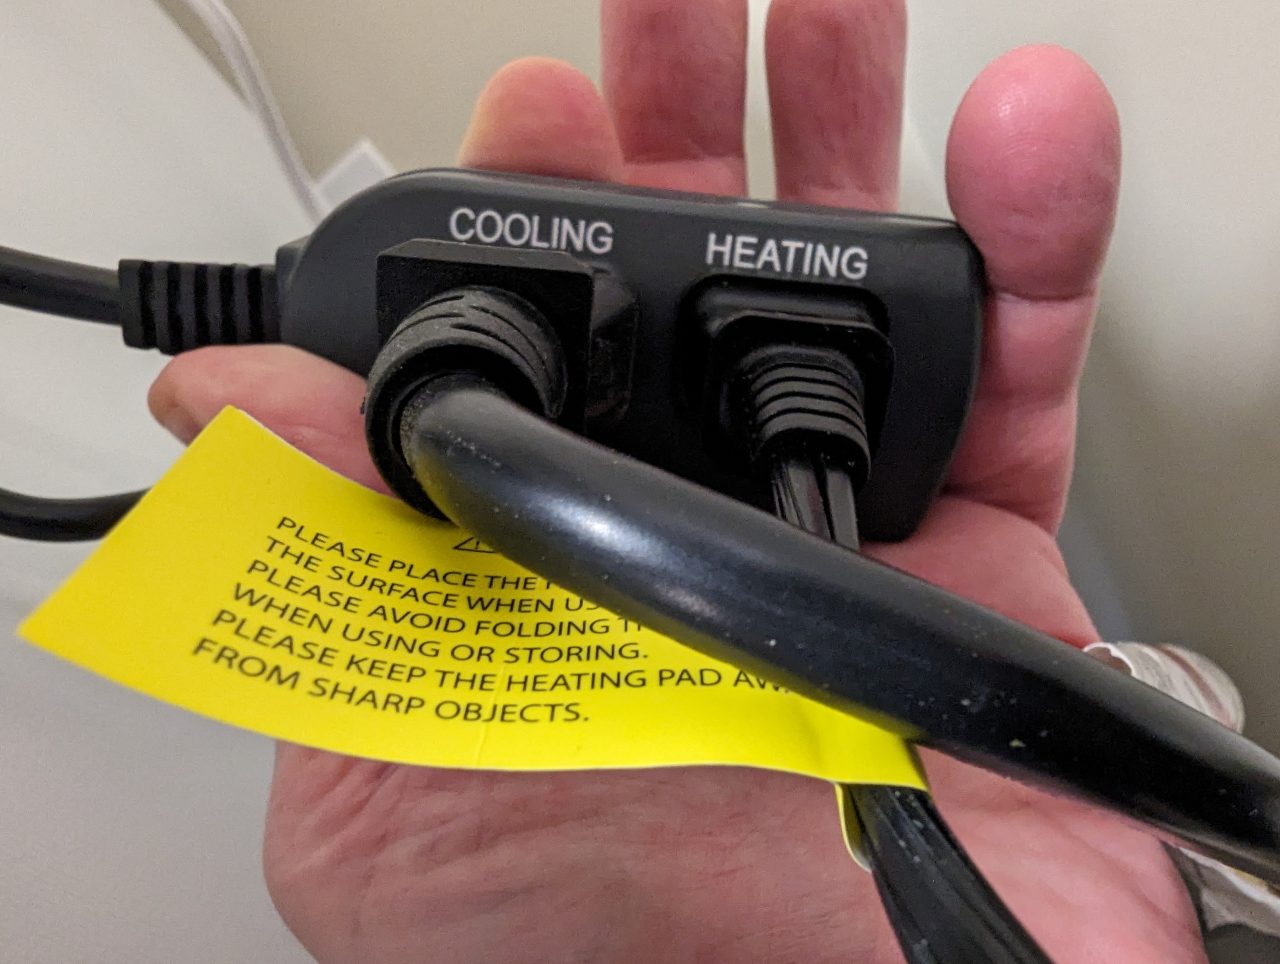
I say "close to the desired set point" because in the temperature controller settings, you set the number of degrees both above and below the desired temperature you want to allow things to drift. Setting the values to zero would in theory mean if the desired temperature would remain absolutely as stable as possible, but it would also mean you thrash the hell out of your equipment, which is particularly bad for compressors in cooling sources like refrigerators and freezers.
I set the temp controller to allow a drift of 2 degrees in either direction which to me seems a pretty reasonable balance. Bear in mind that once the beer in the fermentation chamber hits a particular temperature the thermal mass of several gallons of liquid is such that the temperature will change slowly anyway, so with some occasional nudging things will stay pretty stable.
I also set the refrigeration delay to 5 minutes to be a bit nicer to the freezer compressor. That way if the temp just happens to go up a bit higher than the desired temp, the freezer won't kick on immediately and potentially thrash a bit more than is healthy.
Even if you don't think you want the WiFi controller, get the WiFi controller. It's much easier to mess with the settings in the Inkbird app than it is on the controller itself. Then you can also get alerts on your phone if something goes wrong with your setup, potentially saving your beer!
In the app you can also check the current status remotely, which I do a bit obsessively at the moment since I just set this all up.
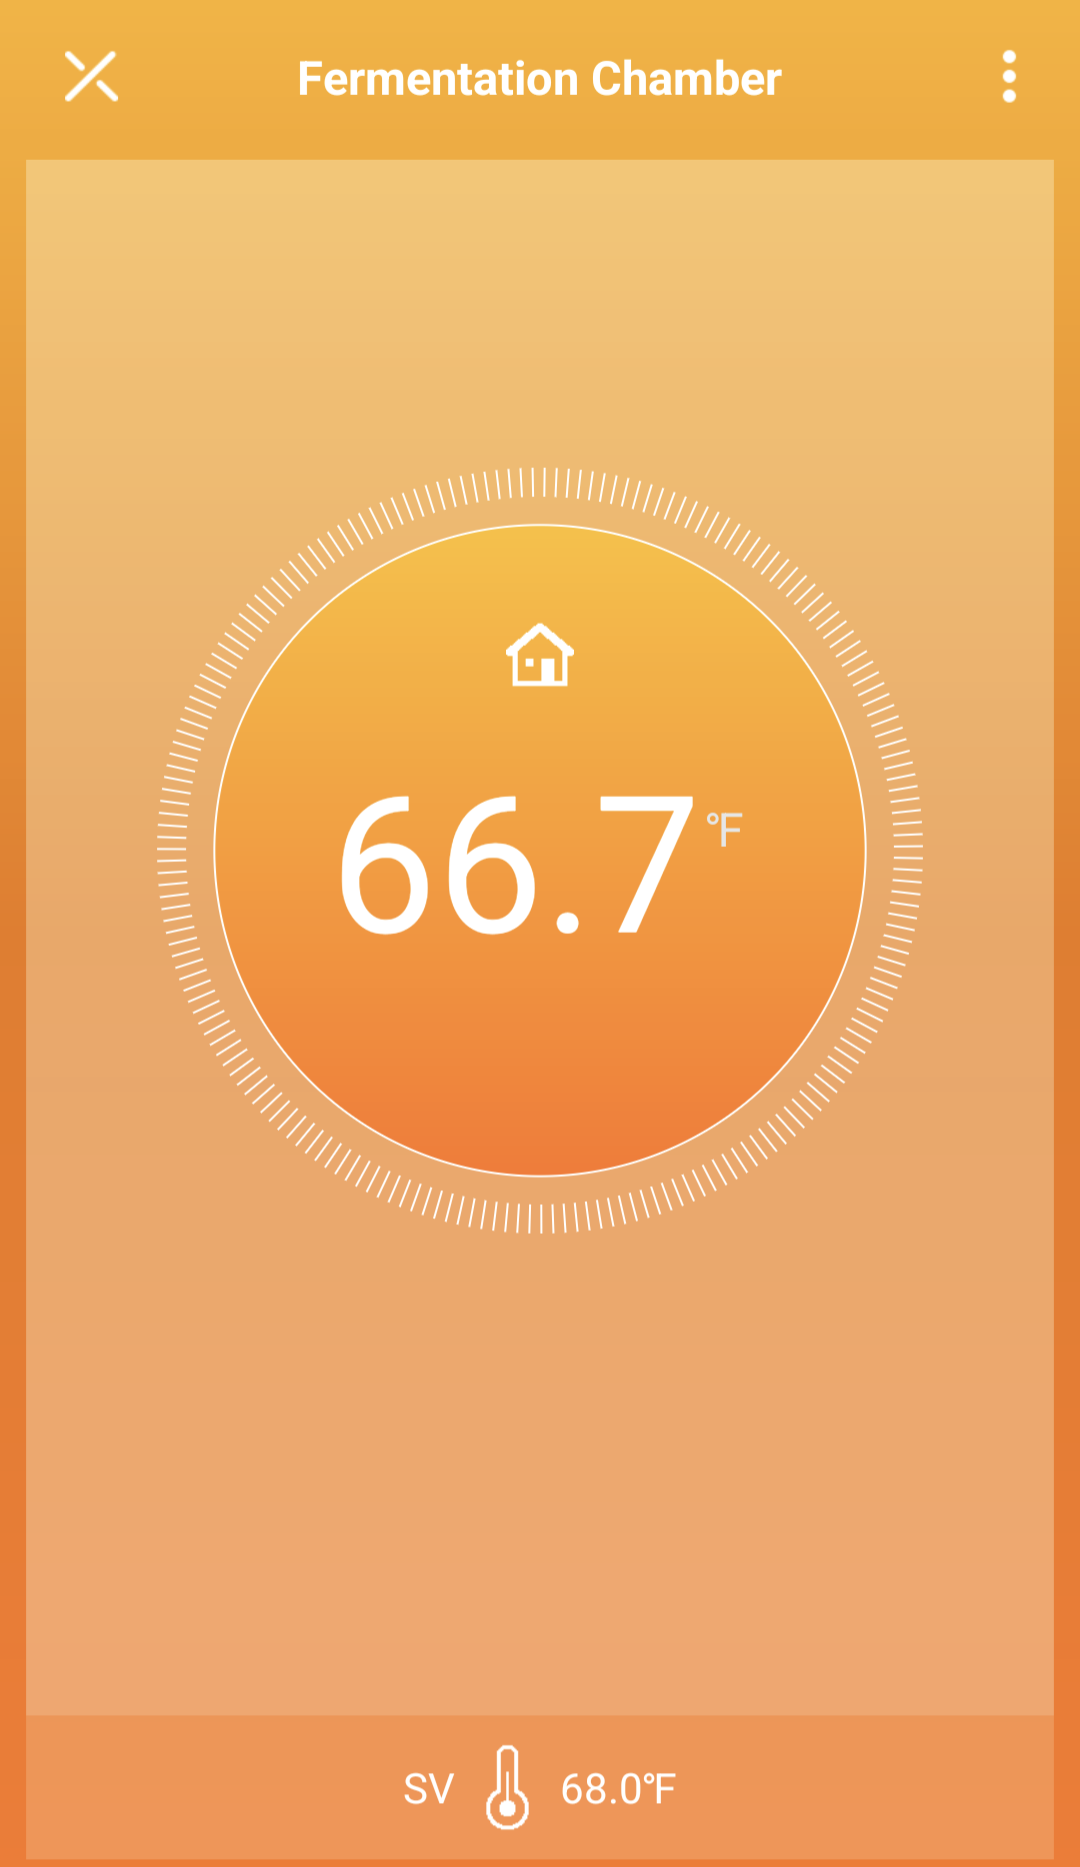
Note that the orange screen doesn't necessarily mean it's actively heating. That's just what it last had to do to get the temperature within range. If it needs to cool you'll see a blue screen.
Temperature Stability
So how stable does this setup keep the temperatures?
Very.
Over the course of two days of fermentation it's been remarkably stable in the 66-68 degree range, with this snapshot from today being pretty typical.
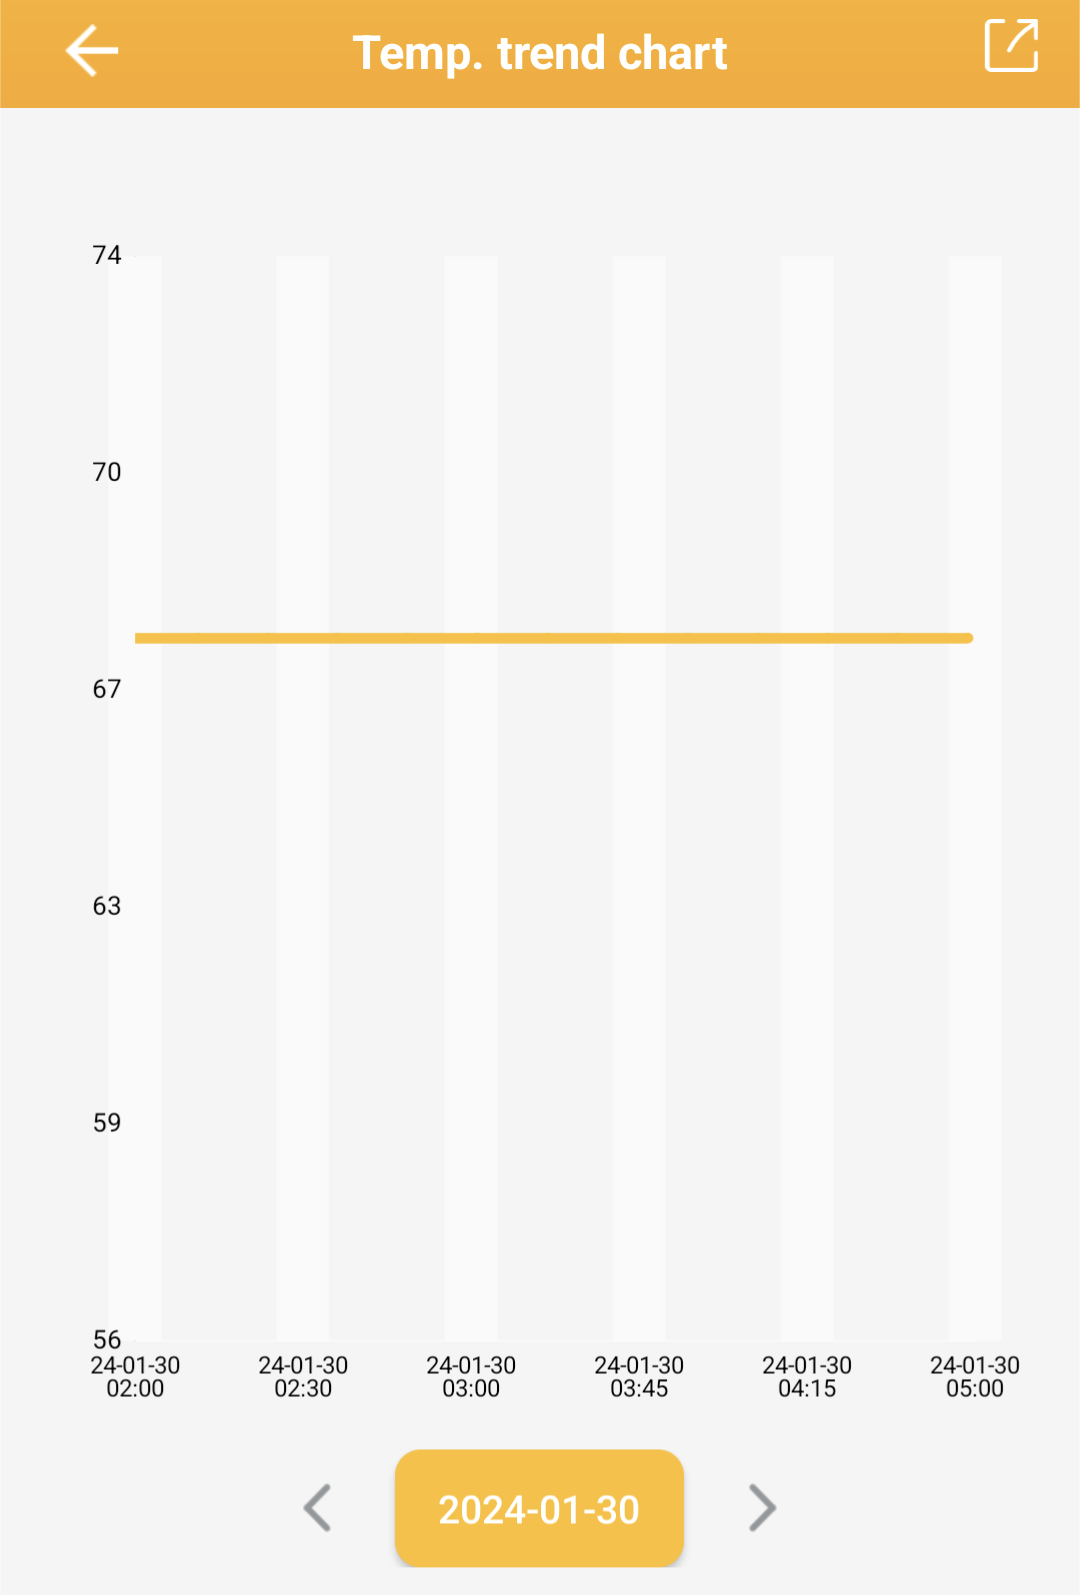
Another big benefit of the WiFi controller is you get to do cool data nerd stuff like this.
Temperature Probe Placement
For the batch that's currently fermenting (an American Red Ale) I'm using a 3-gallon Fermonster. I didn't have a stopper with a thermowell (two are on order now!) so I put the Inkbird temperature probe against the outside of the fermenter, put a paper towel over it, and taped the paper towel to the side of the fermenter to hold it in place.
In the future if I only have one batch going at a time I'll use the thermowell, but if I have multiple batches going at once, I'll probably get a gallon water jug and tape the temperature probe to the side in similar fashion to use as an admittedly imperfect gauge telling the temperature controller when it needs to take action. Or, if one batch is say a week into fermentation I might let the new batch be the guide since it'll have more temperature variation based on yeast activity.
Obviously that's a little less than ideal, but it'll still be an improvement over my previous setup of having three or four 1-gallon batches at various stages in the brewing space itself, because the mini-split has much wider temperature variations than I'm seeing in the fermentation chamber thus far.
Conclusion
That's a wrap on this project! This was a fun project and pretty easy to set up, and I LOVE the fact that I'm getting my fermenters in an environment where they're going to be much happier. The temperature stability is amazing so far and this is one of the #1 ways to improve the quality of your homebrew.
If you poke around the internet you'll see a LOT of attention on the "hot side" of the homebrewing process, with all manner of fancy ways to heat up wort.
That's all well and good -- I love gadgets as much as the next person -- but if you already have a way to heat up your wort and are looking for the next facet of your brewing in which to invest some time and money, I would 100% recommend focusing on the cold side and getting something in place to ensure good fermentation temperature control.
And a HUGE THANKS to everyone who ever shared how they built out their fermentation chambers. I wound up with a slightly different solution than I've seen others do, but the constituent parts are an amalgamation of the collective knowledge of many online forums and YouTube videos. This spirit of sharing is one of the many things I love about the homebrew community.
I'll share the end results of this batch in another 2-3 weeks, which if I get my act together will also be the first batch served from the new kegerator.
Cheers!